• Skip to primary navigation
  • Skip to main content
  • Skip to primary sidebar

HookedOnPlants

When getting hooked is a good thing

  • Jules
  • Why Vegan?
  • Optimize Your Diet
  • Podcast
  • Recipes
  • Contact
  • Free Breakfast Recipe Book
  • Shop
  •  

julia

How To: Make Your Own Kombucha

June 8, 2017 By julia

The BOOSH!

A heavenly, thirst-quenching, carbonated bevy. I think it’s a miracle this stuff exists.
If you’re into pop and can’t kick the habit. You have come to the right place.
Not only does it kinda taste like pop, but it’s endless benefits allow you to sip away while you can truly feel good about what you’re sipping on.
And, rather than spending the big bucks for store bought Kombucha, why not make your own and feel like a brewmaster?
I count down the days until I can dive into my next batch.
Let’s clarify a few questions you might have first.
What is Kombucha?
Kombucha AKA ‘Boosh’ is a fermented, bubbly, tangy beverage with a multitude of benefits. It’s extremely satisfying, carbonated and brought to you by… the Scoby.
What is the Scoby?
Scoby stands for “symbiotic culture of bacteria and yeast”… AKA the Mother. It’s actually a living culture that looks like a jelly fish mushroom pancake. This culture is the living home for the yeast and bacteria that transforms your sweet tea into fizzy, fermented, refreshing kombucha.
Where do you get a Scoby?

There are 3 ways you can get yourself a Scoby:

  • From a friend who is already brewing their own Kombucha. All they need to do is peel off a few layers (creating one thick layer) of their own Scoby, and transfer it to you with some of the liquid from their the batch. The Scoby likes to be smooth-side up (you’ll notice a smooth side and a rough/stringy side). You can transfer it in a zip-lock bag (which you will rinse and re-use, of course;) then get it into your glass jar with the rest of your tea as soon as you can.
  • Buy a Kombucha Starter kit at almost any health food store.
  • Start your own Scoby:
    1. Buy a bottle of raw, unflavoured kombucha at the store.
    2. Pour the raw kombucha into a large glass jar. (Optional – you can create more liquid/food for the Kombucha to ferment in by making 1 cup of black tea with 1-2 tbsp of white sugar, letting it cool, then adding this sweet tea to the jar with the original store-bought boosh).
    3. Cover the jar with a few layers of cheese cloth and secure it with a tight rubber band.
    4. Leave the tea to ferment in a room temperature cupboard for about 7 days.
    5. You should see your Scoby developing on top of the liquid (it will look like a clear film, then become more white and thicker as the time goes by. If you don’t see any sign of a scoby after 3 weeks, discard all of it and start over with a different store bought kombucha. Wait until the Scoby is at least 1/4 inch thick before using it to brew your first big batch of Kombucha! This could take up to 1 month.
    6. Keep your new Scoby and the tea for making your first batch of Boosh.


Benefits of Kombucha:

Just like all fermented things (sauerkraut, kimchi, miso, kefir, tempeh, pickles, natto, coconut yogurt) …

Kombucha has a MEGA-DOSE of benefits!

  • Increases good gut bacteria
  • Contains probiotics
  • Aids digestion
  • Detoxifying
  • Immune support
  • Reduces inflammation
  • Contains antioxidants
  • More energy
  • Cleanses liver
  • Helps with weight loss
  • Helps you sleep better
  • Cancer prevention
  • Hangover helper


How To:

Make Your Own Kombucha

First, a few things to know:

  • Every batch tastes a bit different. This depends on brewing time, temperature, and the strength of the tea. This is all part of the excitement.
  • Always have clean, non-soapy hands when handling the Scoby and the glass jar.
  • Use hot water to wash the glass jar (AKA the Scoby’s home). If it still looks grimy, use white vinegar with hot water every few washes. No soap.
  • For the batch liquid, use filtered water, if possible. Tap water from Whistler works well for me though!
**Scroll further down for Step-by-step with photos**
Prep Time: 15 minutes
Waiting Time: 10-25 days
Servings: 3-4 large mason jars
What you’ll need:
  • cheese cloth (enough to cover the top of your jar, folded over 3 times)
  • elastic
  • large glass jar (try to get one without any metal spout- it doesn’t work anyways because the Kombucha clogs it- and make sure it’s all glass!)
  • 4 large mason jars
Ingredients:
  • 7 bags of organic black tea
  • 1.5 cups of organic white sugar (don’t worry, the Scoby will eat most of the sugar up while it ferments)
  • about 16 cups of water, as clean as you can get it (filtered is best, but my Scoby doesn’t mind Whistler tap water)

Directions:

  1. Bring 4 cups of water to a boil in a pot
  2. Once boiling, turn off the element
  3. Add the 7 black tea bags and the sugar to the water, and stir
  4. Let the tea sit and steep for 10 minutes
  5. Pour the hot tea into the large glass jar
  6. Fill the jar up with 14 more cups of cold water
  7. Place the Scoby in the water, rough side down, smooth side up
  8. Use a few layers of the cheese cloth as a lid with an elastic
  9. Place the jar of Kombucha in a cupboard or pantry for 10-20 days
    (At day 10, taste it to see if its bubbly- if not, leave it for a few more days until you like the amount of bubbles !)
  10. Once it’s finished fermenting to your liking, carefully take the Scoby out and place it on a plate (rough side down) while you get the next batch ready.
  11. Pour the Kombucha into mason jars. You can tighten the lids, keep it in the fridge and drink it as is  OR carry 0n to the next step…
  12. This is optional, but makes the Kombucha even more bubbly and delicious.
    • Secondary Fermentation – add flavour your mason jars by adding fresh ginger, 1 tsp of maple syrup, fresh fruit chunks or purée, or fresh herbs. Tighten the mason jar lids and leave them in the cupboard for 1-3 days. This will create a more carbonated and flavourful Kombucha. Then, place them in the fridge to halt the carbonation.


    **Step-by-step with photos!**


Once the water is boiling, add organic sugar and tea bags.

Remove the tea bags after 10 minutes

Picture

Pour the hot, sweet tea into your large glass jar

Fill the jar with about 12 more cups of water

Add a little bit of the last batch’s liquid

Place the Scoby, smooth side up, into the liquid

Cover with a cheese cloth and rubber band, and place into your cupboard away from the sun for 10-20 days (I have 2 jars that I rotate between every 2 weeks).

Once it’s fizzy and ready, remove the Scoby with a bit of the liquid, set aside, then pour the Kombucha into air tight jars.
Place the mason jars in a cupboard to secondary ferment along with fruit, maple syrup, or herbs for 2 days.
OR just put them in the fridge! They’re ready to drink now, but won’t be quite as bubbly or flavourful without the secondary fermentation.
Nice work brew master!
Since the Scoby is a living culture, don’t forget to talk or sing to the Scoby to keep it happy!
Too hippy for you?
Ok, just enjoy the refreshing boosh you have just created.

Filed Under: Drinks, Raw, Recipes, Salt Free, Snacks, Uncategorized Tagged With: at home kombucha, boosh, fermented beverages, ferments, how to brew kombucha, kombucha, kombucha brewing, make your own kombucha, raw, raw drink, secondary fermentation

The Perfect Smoothie Bowl

June 1, 2017 By julia

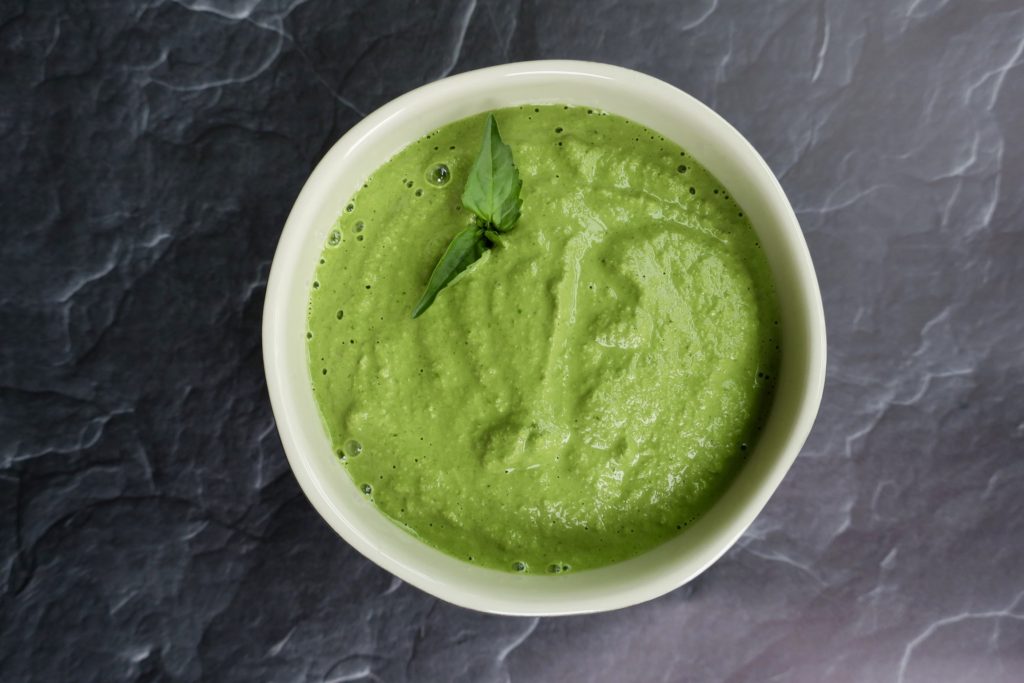
The secret to the perfect smoothie bowl?


Creativity, nutrient-dense ingredients, experimentation and love.

Simple right?

I make smoothie bowls for breakfast, lunch, even dinner sometimes on those lazy but clean-feelin’ days. What could be easier?

Why eat your smoothie with a spoon???

Smoothies are amazing, but usually they slide down the hatch too fast.

The digestion process for carbohydrates (which include fruits and vegetables) starts in your mouth. The process of chewing creates saliva with the necessary digestive enzyme, amylase to begin the breakdown process of carbohydrates. So, the more you chew your food, the more surface area it creates, and the more easily digested and assimilated your nutrients are. This is why it is extremely important to slow down, chew as much as possible, and breathe between your bites. Good digestion leads to weight loss, efficient nutrient absorption, more energy, less bloating, and the prevention of disease. YAY for all of that.

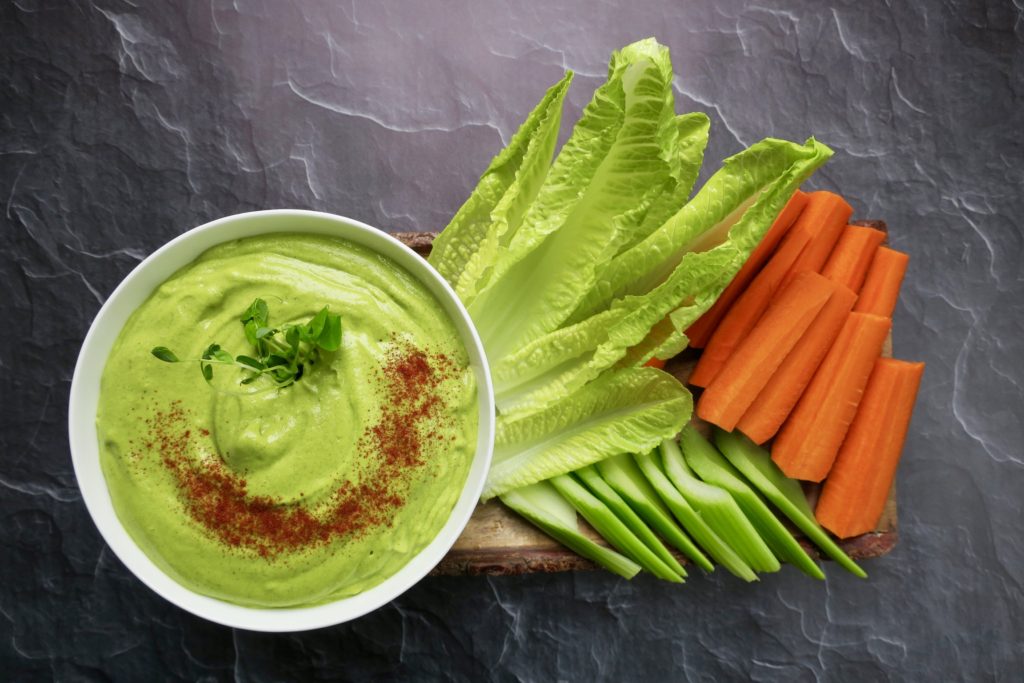
So, it’s great to create smoothie bowls, rather than downing a smoothie, because this forces you to slow down your consumption, and actually chew your smoothie one spoonful at a time! Plus, it’s even more satisfying to have that spoon to mouth action.

If you just don’t have the time to create and devour a bowl of smoothie goodness, then just take it in a to-go cup and remember to chew it before you gulp it.

Go for it and switch up the ingredients for a variety of nutrients, vitamins, and minerals.

Just stick to these proportions and you’ll have the best bang for your nutrient buck, plus a delish smoothie bowl every time!

Why are smoothies SO AMAZING?

  1. They’re the easiest way to hide a salad-worth of greens on yourself.
  2. They are pretty much a delicious tasting, massive multivitamin.
  3. They still contain the fibre and water from the whole-food ingredients they’re made of.

TIPS:

  1. Pack your blender with as many greens as possible (for the easiest blending, put these in first, so they are pressed down with the other ingredients).
  2. Use the fruit as a way to mask any bitterness of the greens.
  3. If you’re on the run and need to make it into a smoothie – just fill the blender up 3/4 of the way with water, pour it into your to-go cup, and add in something like cacao nibs, seeds, buckwheat groats, to chew on. This is a great way to get in the habit of chewing your smoothies.


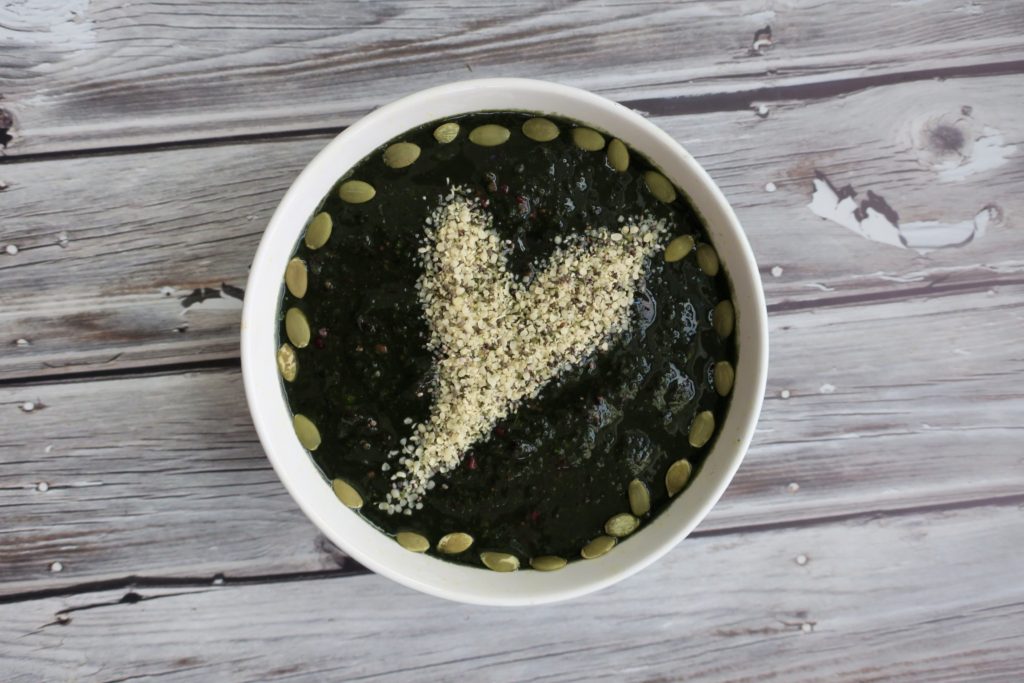
Proportions for a nutrient-dense, tasty smoothie bowl:

  • Packed greens = 3/4 of the blender  (spinach, kale, romaine, celery, cucumber)
  • 2 ripe frozen bananas (add a couple more if you want a soft ice cream consistency, or need more sweetness and calories)
  • 1-2 cups of berries
  • Water or plant-based milk = 1/8 of the blender
  • 1 tbsp of your favourite greens powder (optional)

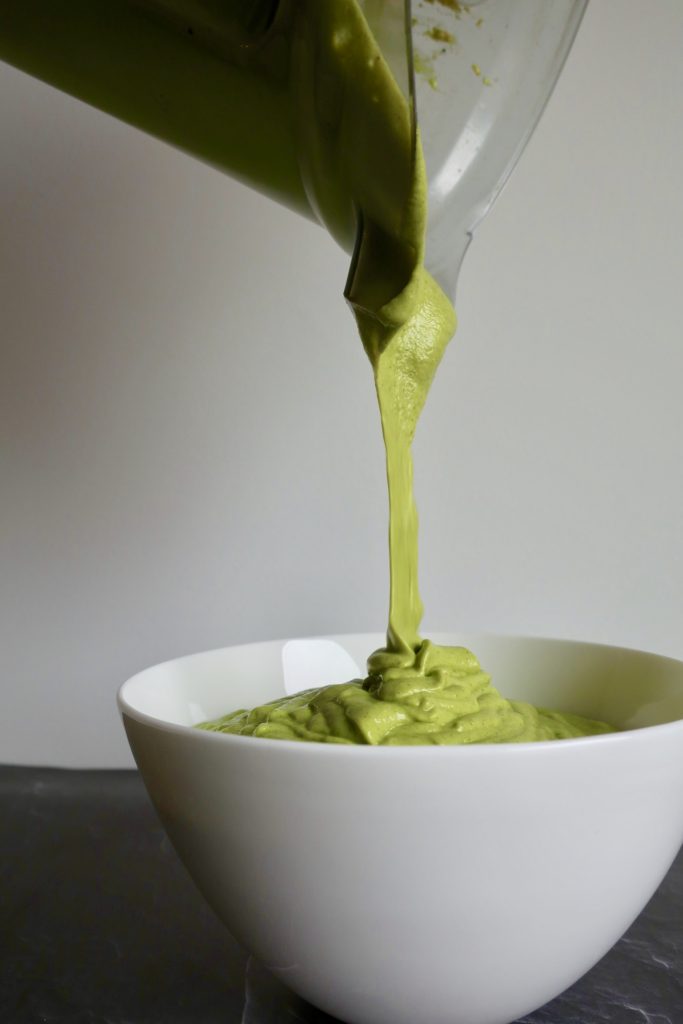
Use your blender’s tamper while you blend it up to help move things along and become smooth.

Optional 1 tbsp add-ins to blend:

~ Ginger: immune-booster and antibacterial (about 1 cm thumb fresh, or 1 tsp powder)

~ Turmeric: nature’s best anti-inflammatory (about 1 cm thumb fresh or 1 tsp powder)

~ Molasses: for hair, nails, bones and iron levels (about 1 tbsp)

~ Adaptogenic herbs like maca, astragalus, ashwaganda, shisandra, rhodiola: all of these restore your body by bringing it back to homeostasis/balance after stress (about 1 tbsp)

~ Medicinal mushroom powders: high in antioxidants and healing properties (about 1 – 2 tsp)

~ Spirulina and/or Chlorella: micro algae packed with protein, anti-inflammatory and detoxifying properties (about 1 tsp)

~ Lucuma powder: maple-tasting and packed with minerals and vitamin A (about 1-2 tbsp)
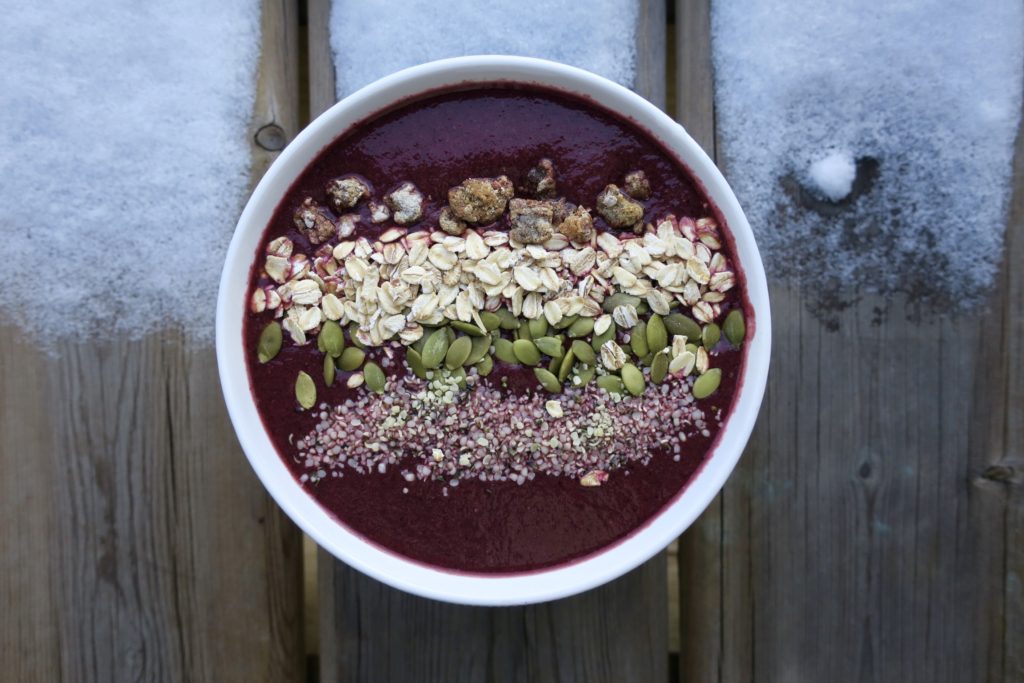
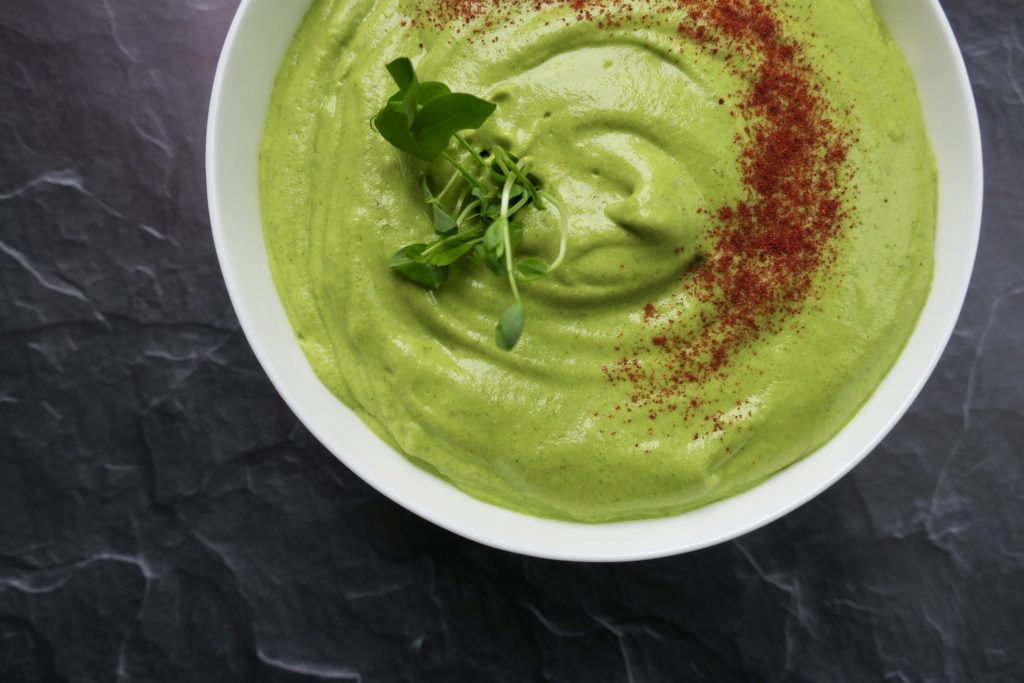
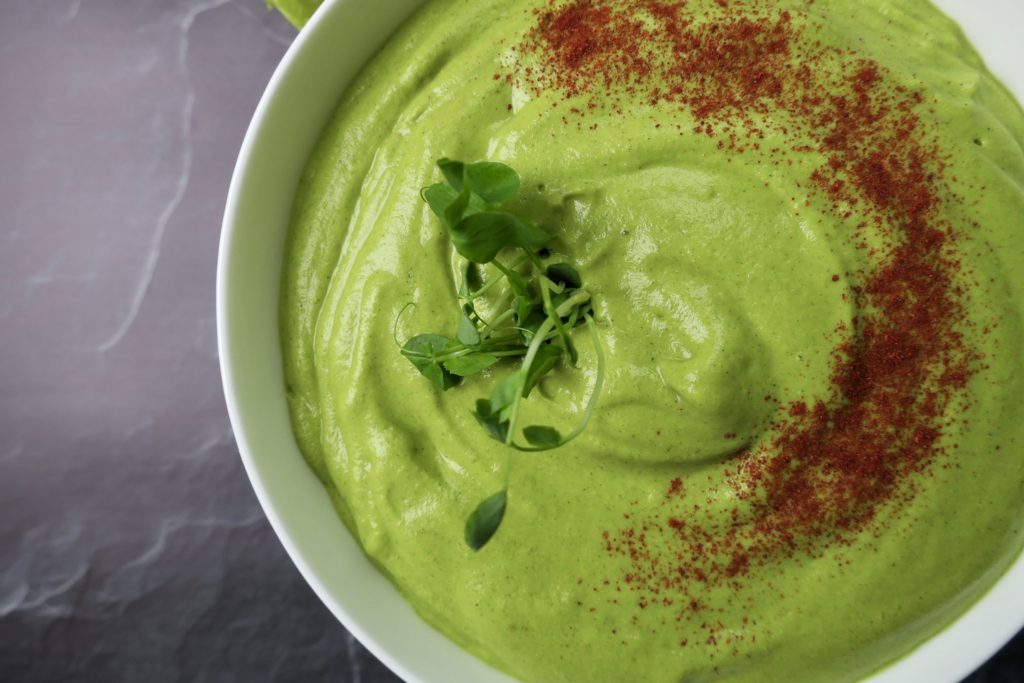
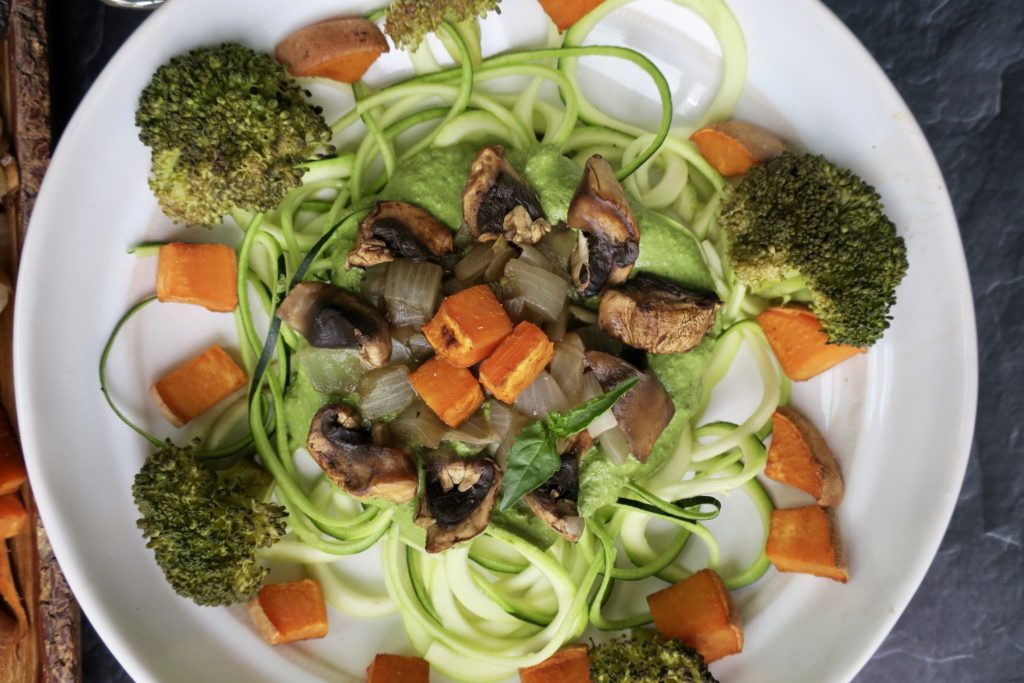
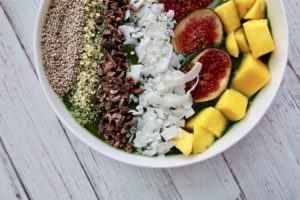
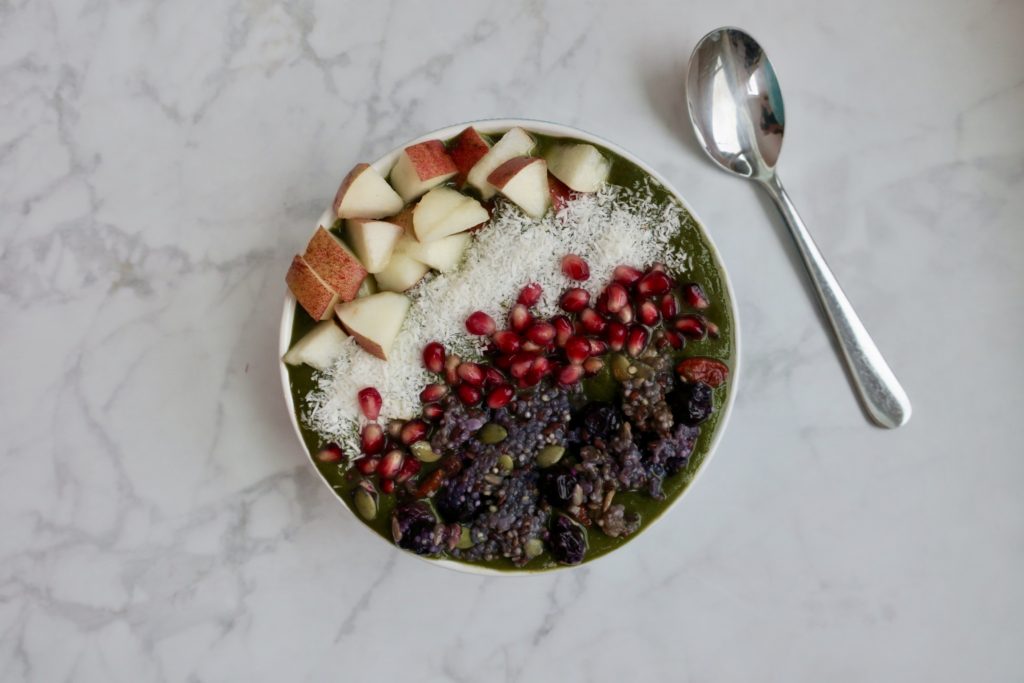
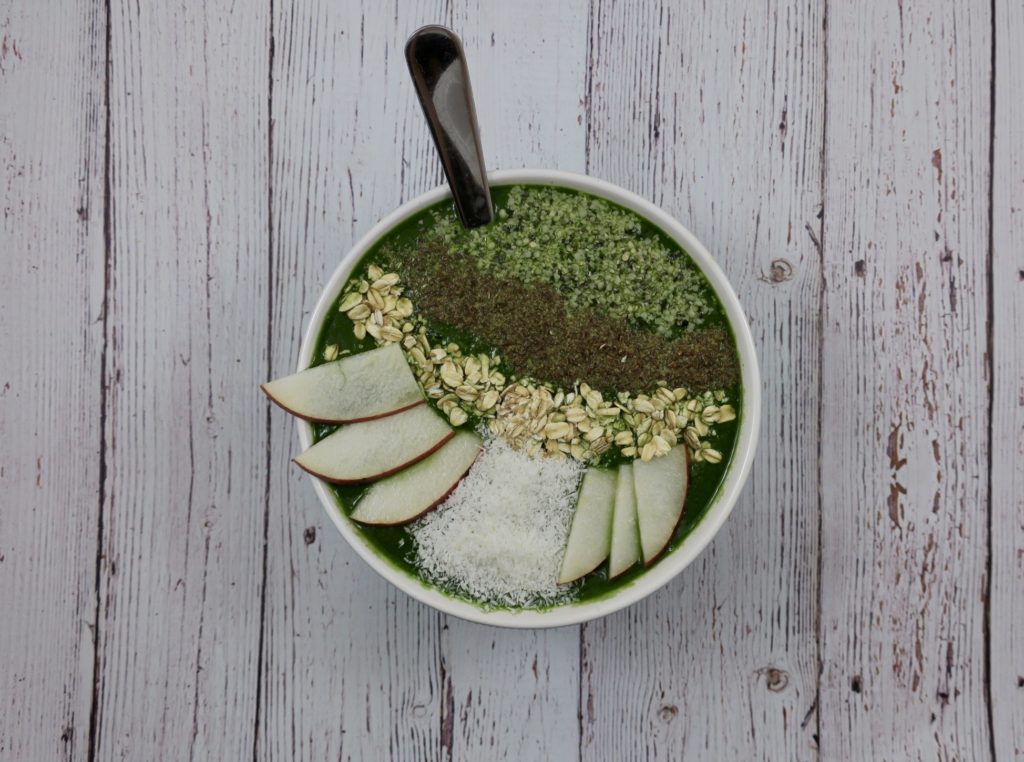
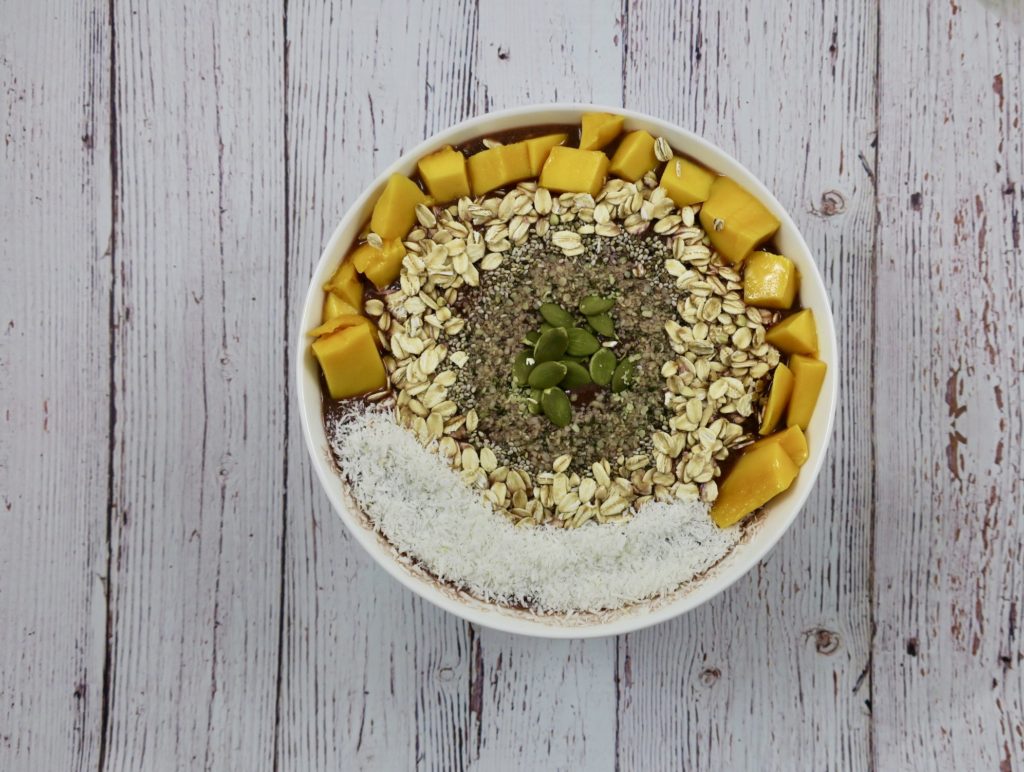
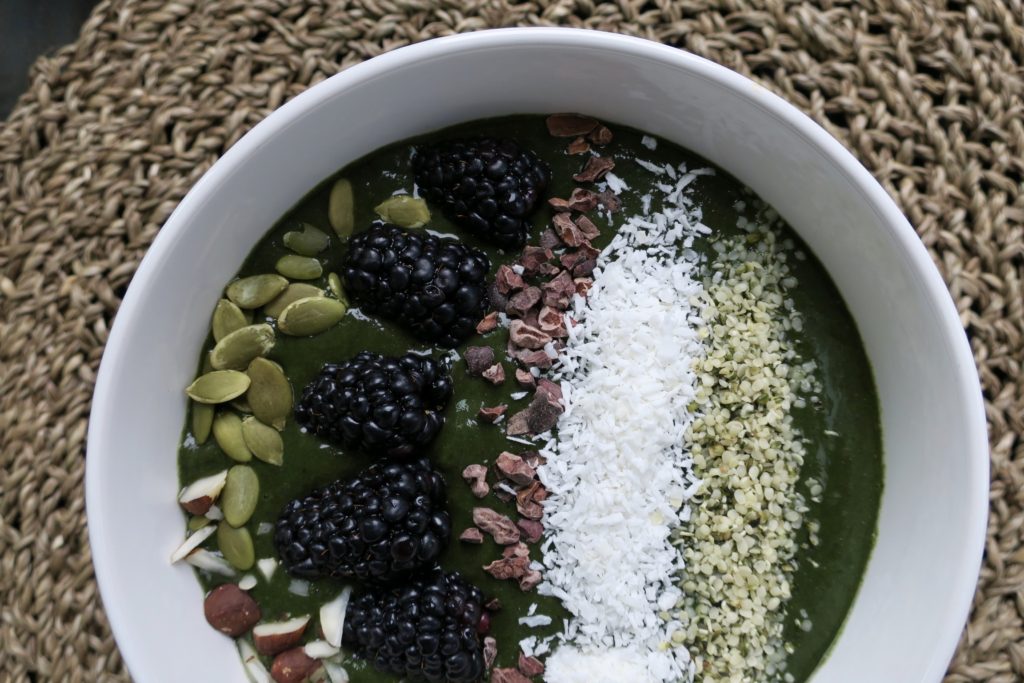
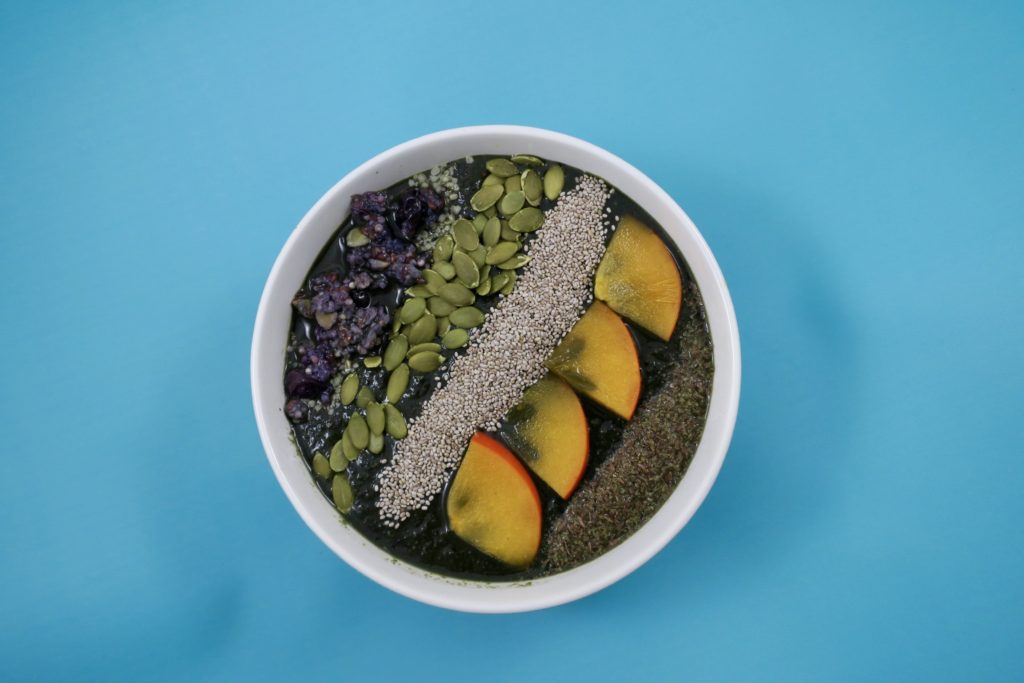
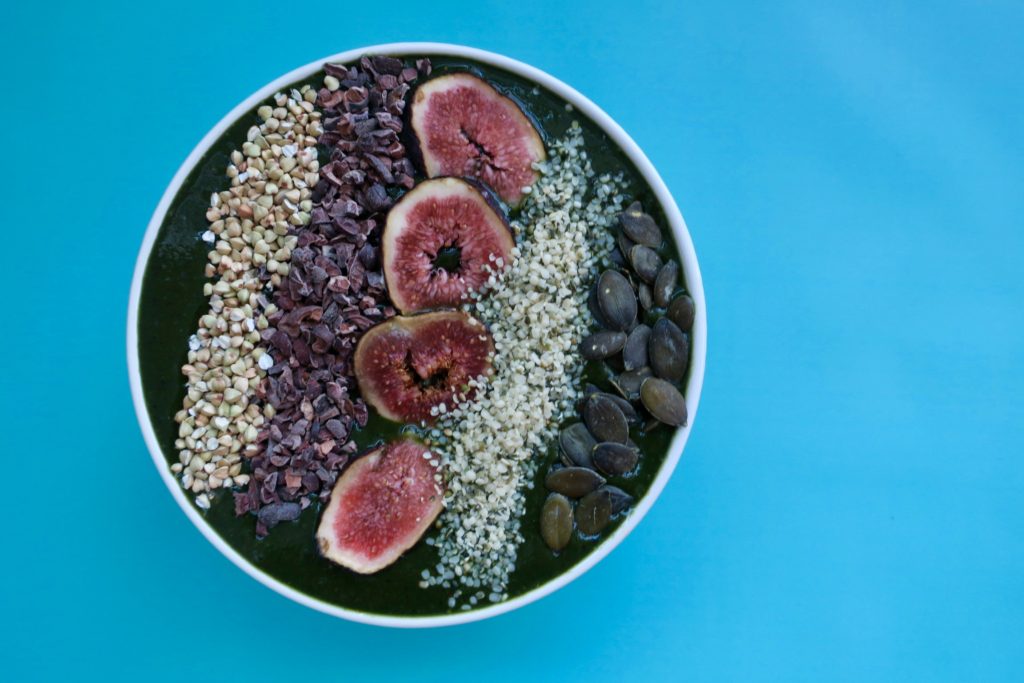
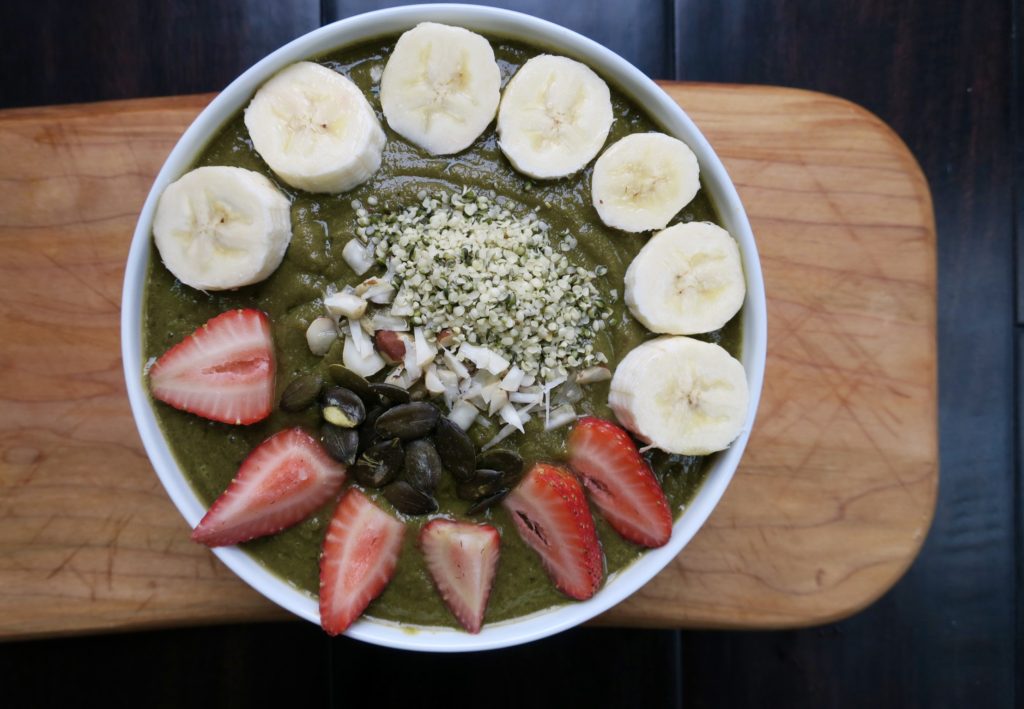
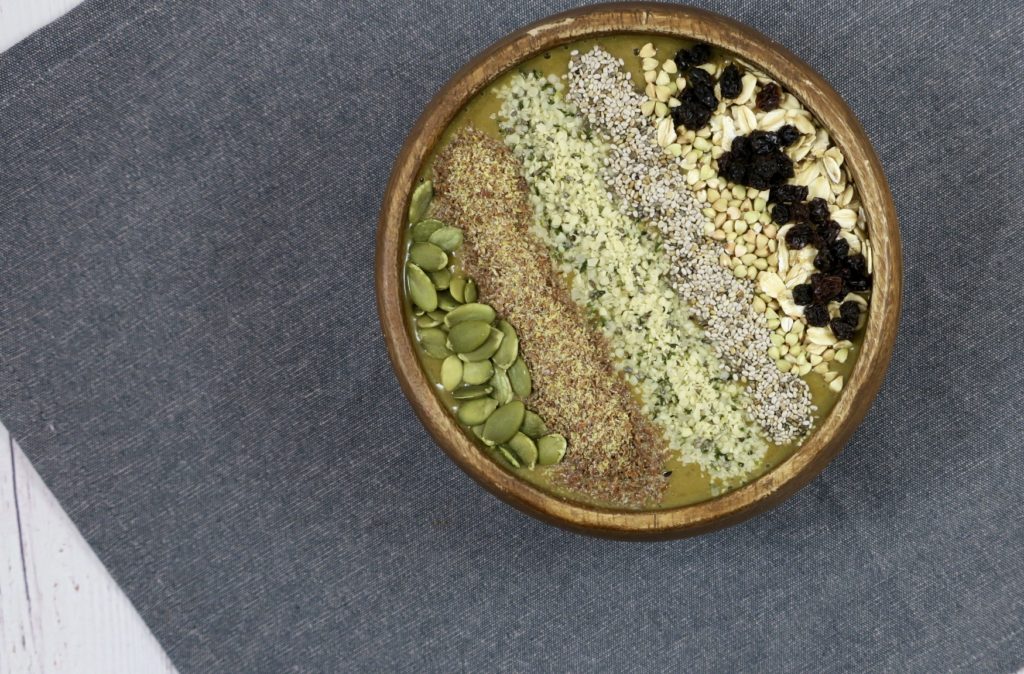
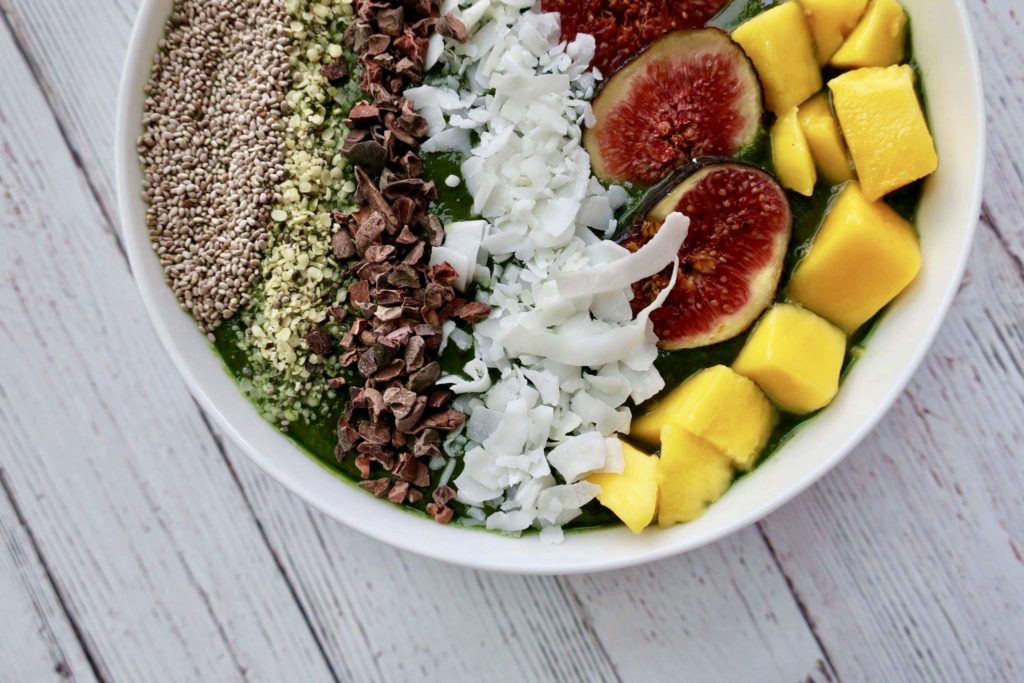
TOP IT OFF

aka

‘make it pretty’:

-Hemp seeds

-Shredded coconut

-Chia seeds

-Pumpkin seeds

-Chopped fruit (banana, pear, persimmon, kiwi, fresh figs….)

-Chopped nuts (brazil nut for selenium is my fave)

-Cacao nibs (for a serotonin and antioxidant-boost)

-Buckwheat groats (for a protein punch and some crunch)

-Rolled oats

–Jules Fuel (my pre-made superfood quinoa breakfast oatmeal)


Happy smoothie chewing!

Filed Under: Appetizers, Breakfast, Gluten Free, Lunch, Oil Free, Raw, Recipes, Salt Free, Snacks, Spring, Summer Tagged With: compassionate food, cruelty free, dairy-free, fruit and veg, gluten free, green smoothie, high nutrient, hooked on plants, nutrient dense, oil free, plant based meals, plant-based, smoothie, smoothie bowl, smoothie chart, smoothie proportions, vegan, vegan breakfast, vegan eats

Strawberry Cacao ‘Cheeze’ Cake | Raw & Vegan

May 25, 2017 By julia

Devouring a dense piece of chocolaty cheese cake doesn’t have to be a complete guilt ridden experience.

If you’re new to this vegan thing, or just want an alternative to the typical heavy duty New York style cheese cake, this has got to be the best way to get your fix.


Simple, raw decadence made up of nutrient-dense whole food ingredients.

I say, WHAT!?  Yes, Please.

Not only that, but even your traditional egg and milk baking grandmother would be impressed.

This pie is perfect for a birthday shindig, or why not the upcoming day for Dad? Father’s Day is just around the corner…

I put it to the test, and the guys in my family go gaga over this one, so I know the ones in yours will devour it too.

All you need to do is blend the crust…

…press it…

…blend the filling…

…then spread it…

Don’t forget to dip some apple slices in there for the clean up crew…

…blend the strawberries… pour it…

and freeze it!

Benefits:

-Cacao is the raw form of chocolate that offers an abundance of cancer-fighting antioxidants. Plus it’s known as a endorphin booster. There’s a reason why we go to chocolate when we’re stressed out. But, make it the pure form of chocolate and you’ll be better off and feeling fine.

-Strawberries are packed with phytonutrients, antioxidants and tons of vitamin C! 


Strawberry Cacao ‘Cheeze’ Cake | Raw & Vegan

Serves: 8-10 people

Time: 4 hours soaking time, 15 minutes prep, 1 hour chill time

Ingredients:

Crust:

  • 1 cup oats (gluten free if needed)
  • 1/2 cup almonds
  • 1 cup pitted dates (if they are very dry, soak 10 minutes then strained)
  • 1/2 cup shredded coconut

Filling:

  • 2 cups cashews (soaked minimum 4 hours, then strained)
  • 1 banana
  • 2 tbsp coconut oil (if solid, melt first into liquid)
  • 1/3 cup maple syrup
  • 1/4 cup cacao powder
  • 1 tsp vanilla

Strawberry Sauce:

  • 1 cup frozen strawberries, thawed

Optional Topper:

  • Fresh strawberries, sliced

Directions:

  1. Make Crust: in food processor, blend oats, almonds and coconut together until meal consistency, Add in dates and blend until cookie dough like consistency.
  2. Press crust into spring form pan (7-9 inch diameter) into an even layer
  3. Make Filling: blend all filling ingredients together in food processor
  4. Pour filling into spring form pan and spread out evenly with spatula
  5. Make Strawberry Sauce: blend strawberries with the thawed liquid in your blender
  6. Pour the strawberry sauce evenly over the chocolate filling
  7. Chill in the freezer for at least 1 hour
  8. Take out of the freezer about 30 minutes before serving, so you can cut through the strawberry layer. Serve with fresh strawberries and/or coconut whipped cream used in the Tarte Tatin recipe!

Filed Under: Dessert, Gluten Free, Salt Free, Spring, Uncategorized Tagged With: cacao, cheezecake, father's day, raw cheese cake, raw vegan, raw vegan dessert, strawberry, vegan dessert, whole food dessert

Green Machine Curried Zucchini Hummus

May 18, 2017 By julia

Hummus.

What does hummus mean to you?

… dipping deliciousness. Not just a tiny bowl of deliciousness, but a massive one. There’s something about dipping your food into yumminess that never gets old.

Sometimes your usual chickpea hummus feels too heavy to dip endlessly. That’s why I love this version of hummus.

It’s lighter, greener, and even more dip-able.

It even goes beyond dipping. Use this for pasta or glory bowl sauce, or bring that sandwich to the next level.

This recipe is inspired by the raw food certification I recently finished, taught by Joanne from The Healing Cuisine at Stay Wild Natural Health. 

What an awesome course! We learned about all the raw food goodness.

Fermentation, nut cheeses, raw crackers, dips, sauces, desserts… OH MY.

Eating your food raw means you’re keeping all of the raw enzymes and vital nutrients live and more easily available. Cooking over 118 degrees degrades the nutrient density of most foods. So, the more raw food you can get into your body, the happier your digestion, your immunity, your hormones, & your whole body will be.

Here’s to high vibrating foods.

Benefits:

~ Zucchini, it’s got potassium for your heart, fibre & water & minimal calories for weight loss, vitamin C for your immune system, and vitamin A for your eyes.

~ Sesame seeds are packed with antioxidant, zinc, and calcium which are great for bone health. The calcium also helps combat migraines and PMS symptoms.

~ Curry powder  is great for the prevention of cancer,  heart disease, and Alzheimer’s disease. Plus it eases pain and inflammation, enhances your immunity, and boosts bone health.

Serves: 4-6

Time: 10 minutes

Ingredients:

  • 2 large zucchinis (about 2.5 cups), chopped
  • 3/4 cup sesame seeds
  • juice of 1/2 lemon
  • 2 garlic cloves, minced (or pressed with garlic press)
  • 1 tbsp curry powder
  • 1/2 cup nutritional yeast
  • 1 tbsp maple syrup

Directions:

  1. Blend sesame seeds, nutritional yeast and curry powder into a flour texture
  2. Add the rest of the ingredients, and blend until smooth (scraping down the sides and using a tamper when needed)
  3. Serve with your favourite raw veggies and crackers.

Filed Under: Appetizers, Lunch, Oil Free, Raw, Recipes, Salt Free, Snacks, Spring, Summer, Uncategorized Tagged With: curried zucchini hummus, green goddess hummus, raw appetizer, raw vegan hummus, vegan appetizer, vegan hummus, vegan snack, zucchini dip, zucchini hummus

Spring Clean Pesto Zoodles

May 11, 2017 By julia

It’s Spring time.

The birds are chirpin’, the days are longer, the cleanses are happening and the bikinis are coming out of the closet.

If you’re looking for a light, yet satisfying dinner, you have come to the right place. Load up on these veggies and give yourself a pat on the back.

This dish is a mega nutrient boost all wrapped up in a healthy, satisfying, creamy dressing.

Eat as much as you can of these goods, because every ingredient in here is is packed with benefits for your body.

The spiralized zucchini noodles are super low calorie, super high nutrient, with tons of fibre and water.

These ratios, my friends, are the perfect ratios for getting that bod bikini ready.

Count nutrients, not calories……. Eat whole foods, not processed.

And you’ll be energized and laughin!

I kept it simple for you; no need to turn the stove on.

All of the veggies can be roasted together without oil while you make the sauce and spiralize your noodles. That’s it that’s all.

This is a great recipe to double, so you’ll have leftovers for your lunches, dinners, made into wraps, fed to your neighbour, you name it.

Benefits:

~ Zucchini is great for weight loss. It’s high fibre and high water content, along with the dose of nutrients and vitamins help you feel full and satisfied, despite the low calorie count. It’s also disease fighting with it’s Vitamin C and beta-carotene content.

~ Basil is packed with disease-fighting antioxidants. It also contains essential oils that help lower inflammation (the cause of most diseases). The phytochemicals are cancer-fighting. Plus, basil acts as an adaptogen, which means it combats stress and helps your body come back to balance (homeostasis).

~ Broccoli is a cruciferous vegetable that has sulfur-containing elements. These are known for their cancer fighting properties! It also aids in weight loss, balances blood pressure, boosts brain power, and is great for your hair and bones.

Spring Clean Pesto Zoodles

Serves: 2 + left over cashew pesto

Time: 40 minutes

Ingredients:

Roasted Veggies:

  • 2 heads of broccoli
  • 1 large yam
  • 1 yellow onion
  • 5 white mushrooms
  • 2-3 tbsp balsamic vinegar
  • 1-2 tbsp garlic powder

Cashew Pesto:

  • 1 cup cashews, soaked for 2 hours in 2 cups water, then strained and rinsed
  • 1 cup water
  • 2 cloves garlic
  • 1 tbsp chives, minced
  • 2 tbsp red onion, chopped
  • 1/4 cup nutritional yeast
  • 1 cup basil (loosely packed)
  • 1 tsp lemon juice
  • 1 tsp maple syrup
  • pinch of salt

Base:

  • 1 large zucchini (you could also use yam, butternut squash, daikon, kelp noodles, or your favourite pasta noodles!)

Directions:

  1. Pre-heat oven to 390F
  2. Roast veggies: spread yams on one sheet, and broccoli, onions and mushrooms on another. Sprinkle on some balsamic vinegar and garlic powder. Give it a mix, and put it in the oven.
  3. For yams: roast 30 minutes, flipping half-way
  4. For others: roast 20 minutes, flipping half-way
  5. Make cashew pesto: add all ingredients to blender, blend until smooth
  6. Spiralize your zucchini (favourite part)
  7. Assemble your dish and enjoy!

Filed Under: Dinner, Gluten Free, Lunch, Oil Free, Recipes, Spring, Summer Tagged With: balsamic roasted veg, cashew pesto, hooked on plants, ready in 40, roasted vegetables, spiralized zucchini, spring cleanse, spring cleanse dinner, vegan dinner, vegan pesto, weeknight dinner, zoodles, zucchini noodles

  • « Go to Previous Page
  • Page 1
  • Interim pages omitted …
  • Page 27
  • Page 28
  • Page 29
  • Page 30
  • Page 31
  • Interim pages omitted …
  • Page 38
  • Go to Next Page »

Primary Sidebar

Search Recipes

WELCOME

welcome-julia-murray

Hi, I'm Julia! I like to simplify plant-based eating and make yummy recipes. I'm a Registered Holistic Nutritionist, certified plant-based chef, Olympian, and I make cereal (Jules Fuel). Enjoy! Read more

Instagram

hookedonplants

🌱 Olympian | Chill Vegan | RHN & Chef
🏠 Whistler Realtor @jules.eliz.murray @living.in.whistler
☀️ Vegan Adventure Retreats

Energy. Good skin. Great digestion: All the things Energy. Good skin. Great digestion: All the things you want your pup to have so they can live life to the absolute fullest. 💛🐾

When we picked Zak up from the SPCA at 7 months, he had hot spots and itchy skin. We tried everything — every food under the sun, even home-cooked meals for a while (yes, we went full gourmet dog-parent mode 😂).

But our sensitive dude still wasn’t feeling his best… until we finally connected with Virchew — made in Vancouver, delivered right to your door in the Sea to Sky, and created by passionate animal lover, Laura.

✨ Hot spots… gone.
✨ Digestion… smooooth.
✨ Energy… he initiates the play.

Tez has been on Virchew since we rescued her in Mexico at around 8 months old. She loved it instantly and has been thriving ever since.

Now these two weirdos have mega energy, shiny coats, and happy bellies, and it feels so good knowing we’re fuelling them with goodness. 🐶💚🐶

Love that dogs can thrive on plants.  It’s a win for the environment & the other animals too. ❤️ 

Try 10 days of Virchew with their Starter Kit. The love and care Laura & the team puts into this kit is NEXT level (treats for hoomans in there too @mymatchalife)

Use ‘hookedonplants’ or the link in my bio for a discount. 

Vet approved & perfect for all doggies of the world. 

❤️ ❤️ ❤️ 

🎥 @crueltyfreewithme 

#vegandogs #plantbaseddog #plantbaseddogfood #vegandog
Something’s cookin’ over on the new Hooked on Plan Something’s cookin’ over on the new Hooked on Plants Substack!

Launch party kicks off this NOW for Black Friyay.

Subscribe to snag 2 complimentary e-books, plus a steady flow of recipes, a supportive community, challenges, and so much more. 🌱✨

This Grateful Fred Tofu Turkey is a must try :)

Message ‘Substack’ for the sign up link. 🎉
A decade vegan now 🎉 Still alive!!!! Happy World V A decade vegan now 🎉 Still alive!!!!
Happy World Vegan day ❤️ 🐽 🐮 

Photo dump of animals, good food, and proof I can still do all the athletic things as a vegan (… the reason I went vegan in the first place was for the anti-inflammatory benefits after my knee surgeries… just sayin’ 🤪)

… The moment I knew I’d stay vegan was one of the first scenes in @earthlingsfilm - I looked at my dog Derby, and looked at the cow on the screen, and thought … what’s the difference? 

Then had a little cry thinking of that poor cow. 

In my next decade, I would like more animal sanctuary moments … please & thanks. 

Anyone out there have an animal sanctuary who needs me to come volunteer? I’ll belly rub (and scoop poop) for those pigs, cows & chickens all day long.
Can every season be Pumpkin Pie season? Pls & thx Can every season be Pumpkin Pie season? 
Pls & thx. 

PS: have you checked out the Chill Vegan holiday Survival Guide & Cookbook?

Message me and I’ll send you the link … so you can make the most out of the holidays with the peeps you love and food you’ll all drool over 🤤

#holidays #veganholiday #holidayvegan #veganfood #chillvegan #christmasfood #veganthanksgiving #vegancookbook
Zak & Tez ‘I want to be on you’ cuteness overload Zak & Tez ‘I want to be on you’ cuteness overload photo dump. 

💜 big canadian bro & little Mexican sis 

@virchewdogs fuelled rescues

#rescuedogs #adoptedontshop #adoptadog @cortez_rescue @bcspca @petfinder
Jane = Total inspiration. Thank you for all of you Jane = Total inspiration.
Thank you for all of your love and compassion. ❤️

Repost from 
@jenny.ar.mcqueen @dxetoronto @peaceful.peter
But, first 👀 have you downloaded my Simple WFPB B But, first 👀 
have you downloaded my Simple WFPB Breakfast Recipe Book?

It’s free. 
Just sign up for my brand new Substack! 🌱✨
Linked in bio. 

3-Ingredient Banana Oat Blender Pancakes (Protein Packed) 🥞

Ingredients:

	•	2–3 ripe bananas
	•	2 cups oats
	•	1½–2 cups plant mylk (any kind works!)

Also… clean Vegan Protein (use code HookedonPlants for a discount). 

Not mandatory, but fluffy-fies those flapjacks:

	•	1 tsp baking powder
	•	1 tsp baking soda
	•	Pinch of salt

✨ Up-level it:

Add a scoop of Vanilla Protein + Greens from Complement and Immunity Blend Mushroom Powder from Stay Wyld (discount links in bio).

For extra flava-flave:

	•	1 tsp cinnamon
	•	1 tsp vanilla

Directions:
	1.	Blitz the oats into flour in a high-speed blender.

	2.	Add the bananas, mylk, and all the extras if you’re feelin’ fancy.

	3.	Blend until smooth, then cook on a lightly oiled pan over medium heat until golden on both sides.

Top with nut butter, berries, or a drizzle of maple syrup 🍁

Tag me if you make these goddamn beauties! 

#veganpancakes #pancakes #easyrecioe #veganbreakfast #easybreakfast #proteinbreakfast
Zak and Tez know how to have a good time. Fueled Zak and Tez know how to have a good time. 
Fueled by @virchewdogs all day everyday (energy up, skin issues down). 
They totally love eachother and it’s ridiculously cute to watch. 

If you want your pup to thrive Virchew is worth a try (& delivered to your door & plant powered & woman-founded). 

👀 Starter Kit is linked in bio!
3 random sprout facts: 🌱 Nutrient bomb: Broccoli 3 random sprout facts: 

🌱 Nutrient bomb: Broccoli sprouts can pack 20–50x more cancer fighting sulforaphane than ‘normal’  broccoli 🥦 (that’s the compound linked to cancer prevention and detox support)

🌱 Tiny vitamin factory: Sprouting can increase vitamin C content by up to 600%, making them a natural immunity booster.

🌱 When you sprout a seed, you flip the switch from storage to growth: 💥 nutrients awaken, enzymes multiply, and the plant’s whole energy is unleashed.

Daily superhero checklist: 
Sprouts ✔ Kraut ✔ Greens ✔ Beans ✔ Whole Grains ✔

Keep it whole
Keep it diverse 
Keep it so fresh & so clean you lean mean fighting machine. 

Want to keep the plant-spiration flowing? 

Join me on Substack 🎉 

Just started sharing fresh tips + recipes … more coming your way. 
🎁 
You’ll get my Breakfast Cookbook if you subscribe for free, and Holiday Survival Guide & Cookbook if you subscribe monthly. 

Look out for 1000 Ways to get Hooked on Plants Hacks over there 👌 

Link in bio 🔗 

Let me know if you need help sprouting !! 

It’s so easy, and nutritious, it’s ridiculous. 

#sprouts #sprouting #wholefoods #vegantips #plantbasedtips
Join the Community

Categories

  • Appetizers (24)
  • Breakfast (40)
  • Brunch (9)
  • Dessert (66)
  • Dinner (81)
  • Drinks (7)
  • fall (4)
  • Gluten Free (98)
  • halloween (2)
  • Holidays (19)
  • Hooked On People Interviews (19)
  • Jules Fuel (5)
  • Lifestyle (22)
  • Lunch (82)
  • Oil Free (92)
  • One Pot (1)
  • Raw (45)
  • Ready under 30 (1)
  • Recipes (158)
  • Salt Free (42)
  • Sauces/Dressings (34)
  • Snacks (80)
  • Spring (42)
  • Summer (43)
  • Thanksgiving (12)
  • Travel (1)
  • Uncategorized (155)
  • Vegan Dogs (1)
  • Veganism (16)
  • Winter (31)

© 2016 Veritas Techsoft Pvt. Ltd

Subscribe to Substack

Subscribe to Hooked on Plants Substack for more Recipes, Tips, Community + How to Thrive Guidea

Complimentary Breakfast Recipe Book for Free Subscribers

Subsribe