• Skip to primary navigation
  • Skip to main content
  • Skip to primary sidebar

HookedOnPlants

When getting hooked is a good thing

  • Jules
  • Why Vegan?
  • Optimize Your Diet
  • Podcast
  • Recipes
  • Contact
  • Free Breakfast Recipe Book
  • Shop
  •  

Snacks

Fudgy Quinoa Brownies + Vegan Camping Eats

June 15, 2017 By julia

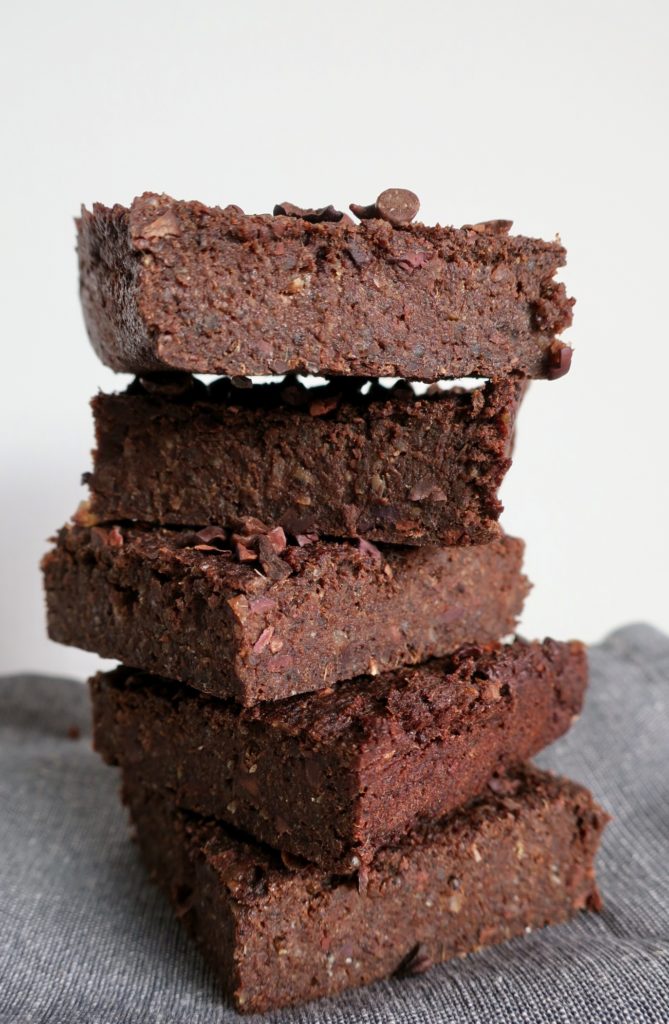
Holy fudgerama. These brownies are tasty.
You would never know there are hidden superfoods in these babies.
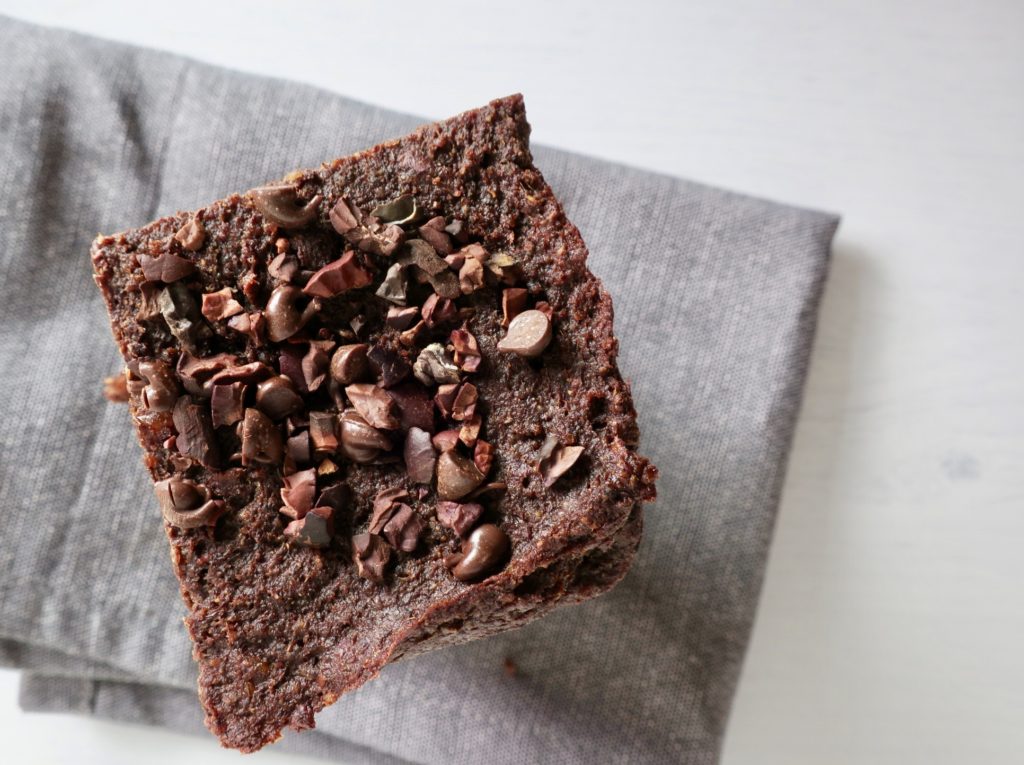
Dense & chewy. That’s what these brownies are all about.
The base? Quinoa and dates. Throw in some superfood ingredients like cacao and cinnamon, and you’ve got yourself a health food that tastes incredibly sinful.
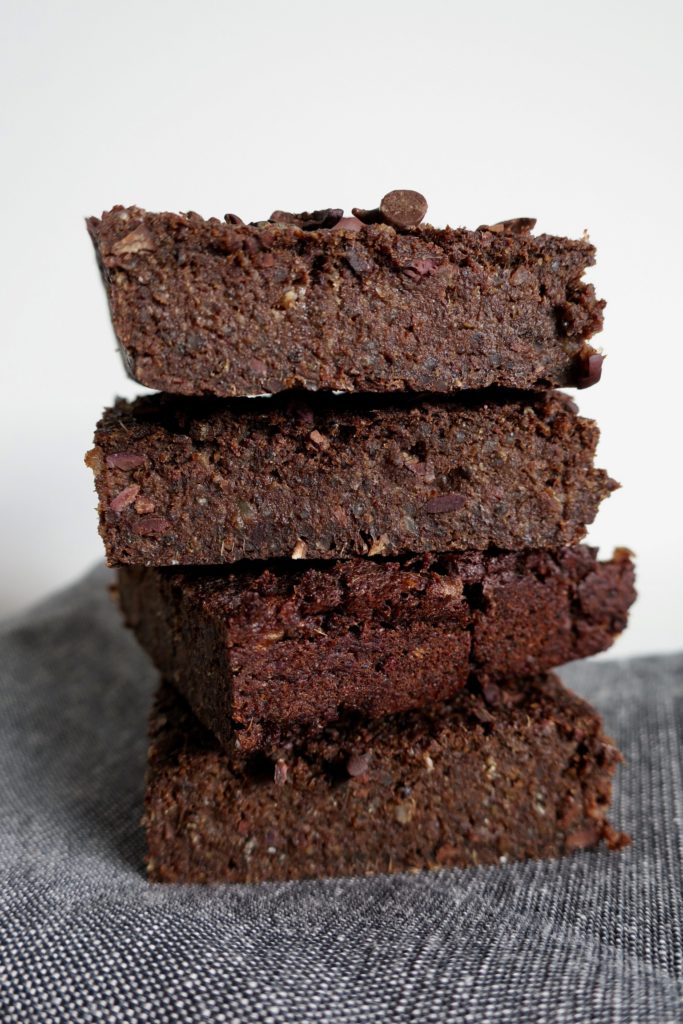
A healthy version of a decadent brownie. YES.
You could eat these for breakfast.
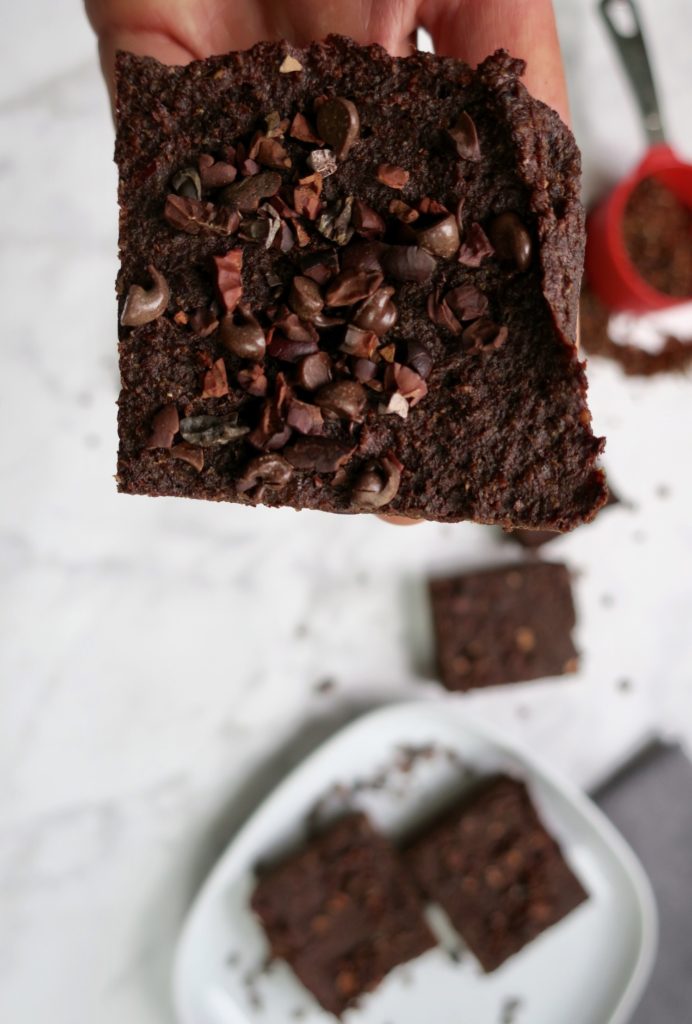
These brownies are also PERFECT for a camping trip.
You know, for those times when you’re hanging around the campsite and need something sweet and luscious to sink your teeth into… Or  for that extra boost of energy on that hike of yours.
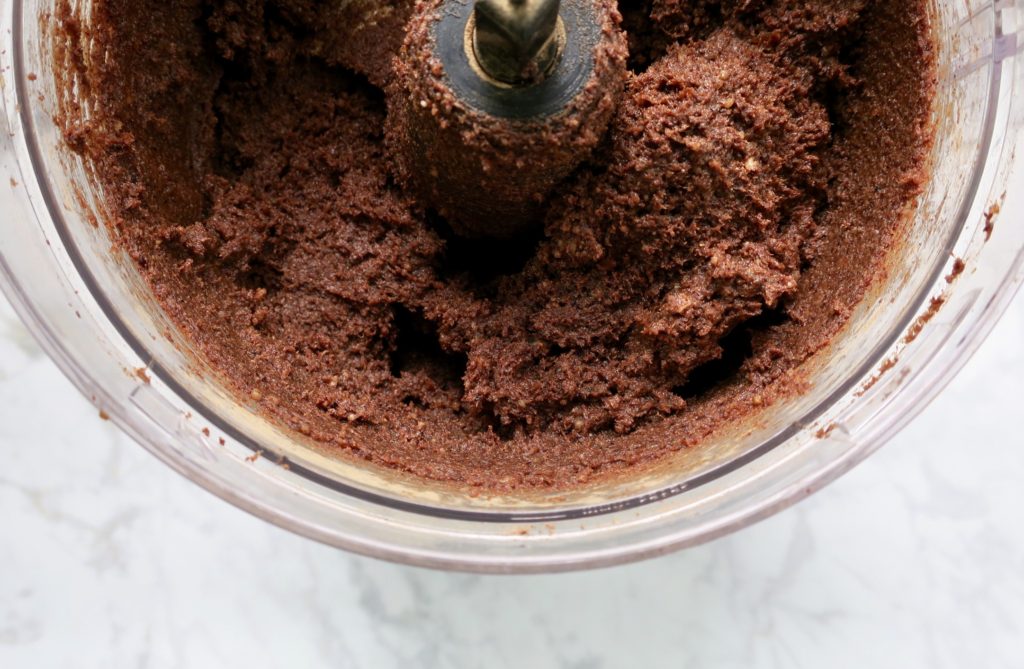
These brownies are packed with whole food ingredients, with out any refined sugar or gluten.
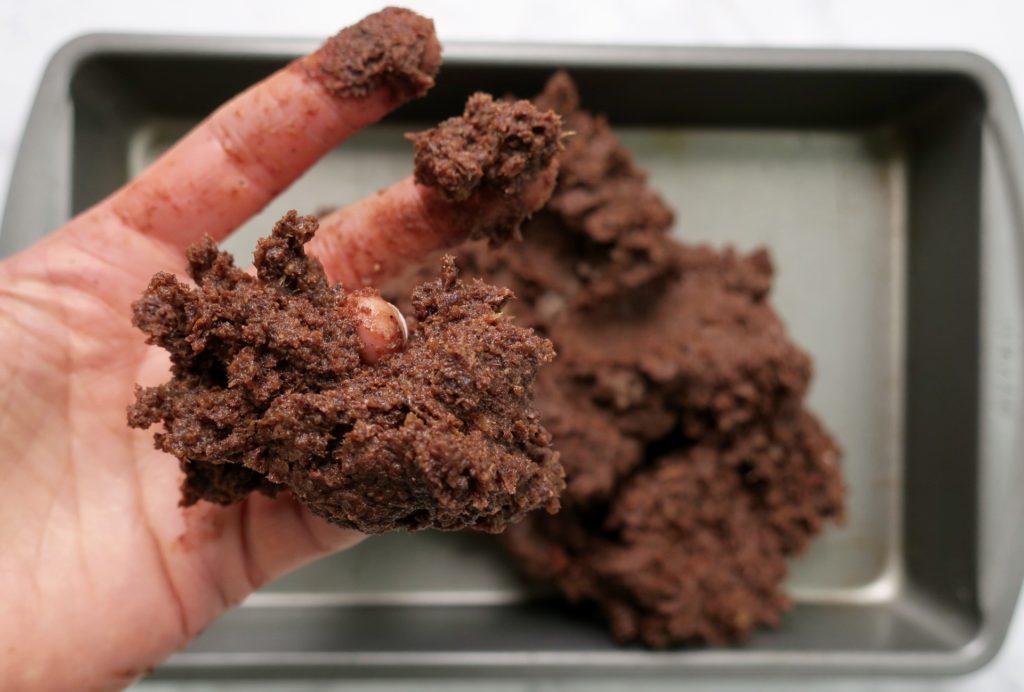
Raise the roof for these morsels of awesome!
On the camping thought, camping as a vegan isn’t as hard as you may think…
What else to eat as a Vegan Camper?
  • Breakfast:
    • Jules Fuel – my superfood quinoa oatmeal!
    • Banana pancakes – pre-make these, then throw them on the fire with some tin foil!
    • Overnight oats – fill a mason jar with oats, buckwheat, maple syrup, dried fruit and seeds, then fill it up with almond milk, shut the lid, and throw it in the cooler!
    • The Vegan Egg (trying this for the first time this weekend while we’re camping) with some Tempeh bacon, tomato, avo, and Chao cheese in a whole grain wrap.
  • Lunch:
    • Roasted weiners (still possible) and dijon wrapped in a bun or romaine – Field Roast and Gusta are the best in my books!
    • Sandwiches: bring your bread slices, tomatoes, lettuce, avocado, hummus, and tempeh (either pre-cooked, or cooked on your skillet)
    • Pre-baked sweet potatoes: wrap them in tin-foil, then throw them on the fire at your campsite. Top it off with nut butter, maple syrup, or a pre-made tahini sauce
  • Dinner: Make it a one-bowl wonder by pre-cooking one of these:
    • Curry
    • Glory bowls
    • BBQ Pasta
    • Pasta Salad
    • Mac & Peas
    • Soba Noodle Salad
  • Snacks:
    • Trail Mix
    • Apples, oranges, bananas, dried fruit
    • Dates
    • Popcorn
    • Dip-ables: hummus & veggies, chips & guac & salsa
  • Dessert:
    • Roasted vegan mellows
    • Roasted bananas: leave the banana peel on, slice vertically half way through, add some nut butter and vegan chocolate chips then wrap in tin foil and throw it on the flame
    • Fire-roasted apples
 
Benefits of these brownies:
  • Quinoa – complete with all 9 essential amino acids, this little seed will provide you with ample protein, and tons of minerals! This is what makes these brownies so satiating.
  • Dates – nature’s candy! These amazing fruits are so sweet, but they also come with the fibre, nutrients, vitamins and minerals your body needs. Because they’re packed with fibre, they’re a great sweetener that won’t spike your blood sugar like the usual suspects (white refined sugar being the worst, and maple syrup being the next best thing to dates).
  • Cacao – hello antioxidants! The raw cacao powder is not only and aphrodisiac, but also a start when it comes to preventing disease.
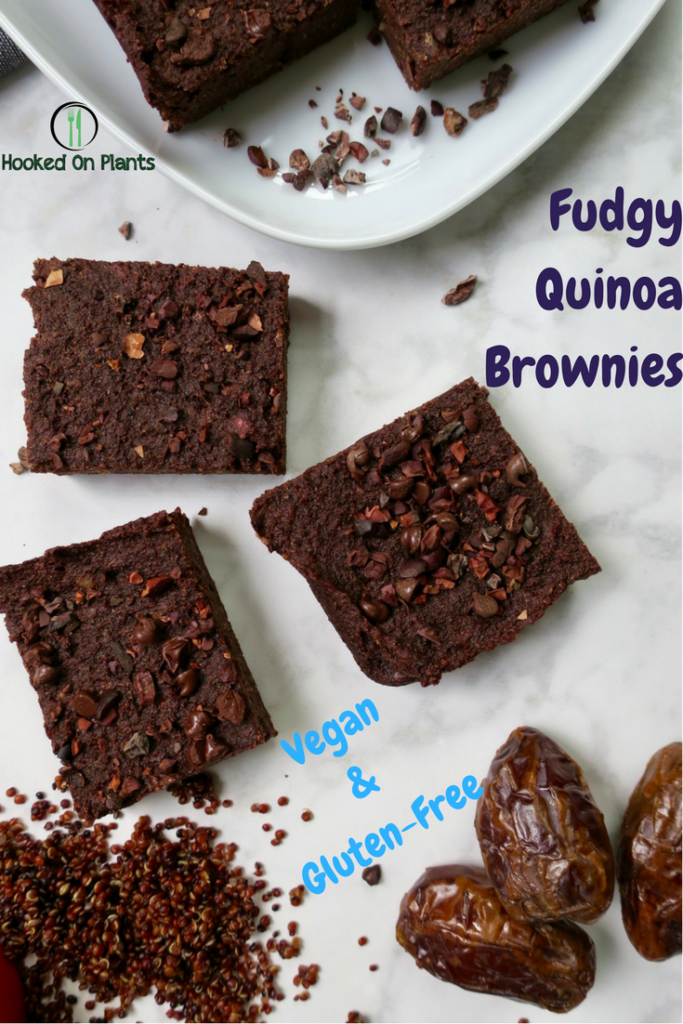
Fudgy Quinoa Brownies 

Vegan & Gluten Free

Serves: 12-15

Time: Prep time: 15 minutes, Cook time: 30-35 minutes

Ingredients: 

  • 2 cups quinoa, cooked (I used red, but you can use white instead!)
  • 2 cups pitted dates, soaked for 10 minutes in warm water, then drained
  • flax egg (1 tbsp flax meal + 3 tbsp water = let sit for 5-10 minutes)
  • 1 tbsp coconut oil (plus 1 tsp for oiling baking dish)
  • 1 tsp baking powder
  • 1/2 cup cacao powder
  • 1 tbsp cinnamon
  • 1 tsp vanilla (powder or extract)
  • 1/2 cup cacao nibs or chopped pecans

Directions:

  1. Pre-heat oven to 350, and oil 8 x 8 baking dish with coconut oil and a paper towel
  2. In a food processor, add the pre-cooked quinoa, baking powder, cinnamon and blend until sticky and almost pasty
  3. Add the cacao powder, vanilla, coconut oil and flax egg. Blend until nearly smooth
  4. Add the drained dates into the food processor and blend until smooth and a ball starts forming. Scrape down the sides when needed
  5. Add half of the cacao nibs, or chopped nuts and blend until combined (not too much!)
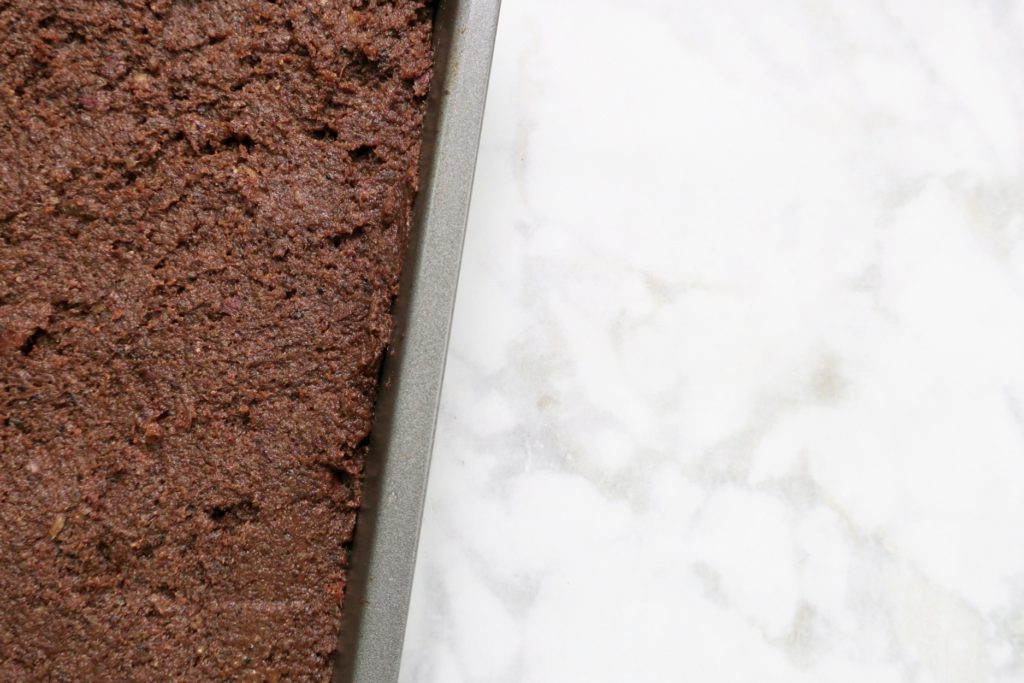
  6. Spread mixture out evenly in the dish, about 3/4 inch thick
  7. Bake for 25 minutes, then top with the rest of the cacao nibs or nuts.
  8. Bake another 5 minutes. Test for ready-ness by poking a toothpick in the brownie (if it comes out clean, they’re ready)
  9. Let cool, then slice into desired sizes
  10. Store in an air-tight container in the fridge for up to a week, or freeze them then take them to-go straight from the freezer!
 

Filed Under: Dessert, Gluten Free, Recipes, Salt Free, Snacks, Spring, Summer, Uncategorized, Winter Tagged With: brownies, cacao brownies, camping eats, campsite food, chewy brownie, easy brownies, fudgy brownie, gluten free brownie, no refined sugar, quinoa brownie, vegan camping, vegan dessert, vegan gluten free, vegan snack, whole food brownies

How To: Make Your Own Kombucha

June 8, 2017 By julia

The BOOSH!

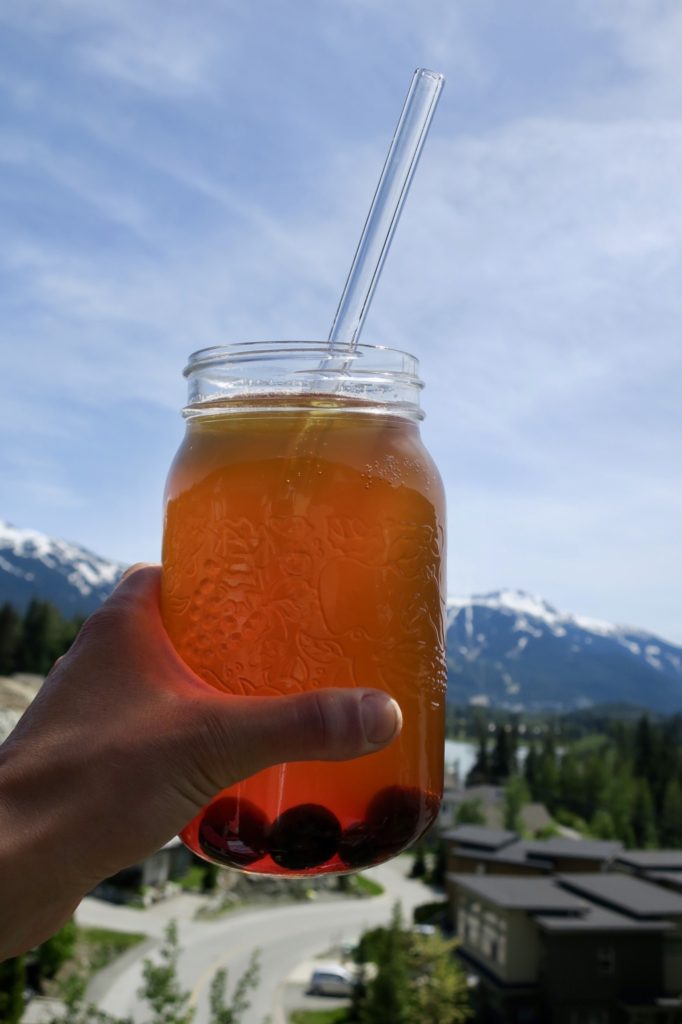
A heavenly, thirst-quenching, carbonated bevy. I think it’s a miracle this stuff exists.
If you’re into pop and can’t kick the habit. You have come to the right place.
Not only does it kinda taste like pop, but it’s endless benefits allow you to sip away while you can truly feel good about what you’re sipping on.
And, rather than spending the big bucks for store bought Kombucha, why not make your own and feel like a brewmaster?
I count down the days until I can dive into my next batch.
Let’s clarify a few questions you might have first.
What is Kombucha?
Kombucha AKA ‘Boosh’ is a fermented, bubbly, tangy beverage with a multitude of benefits. It’s extremely satisfying, carbonated and brought to you by… the Scoby.
What is the Scoby?
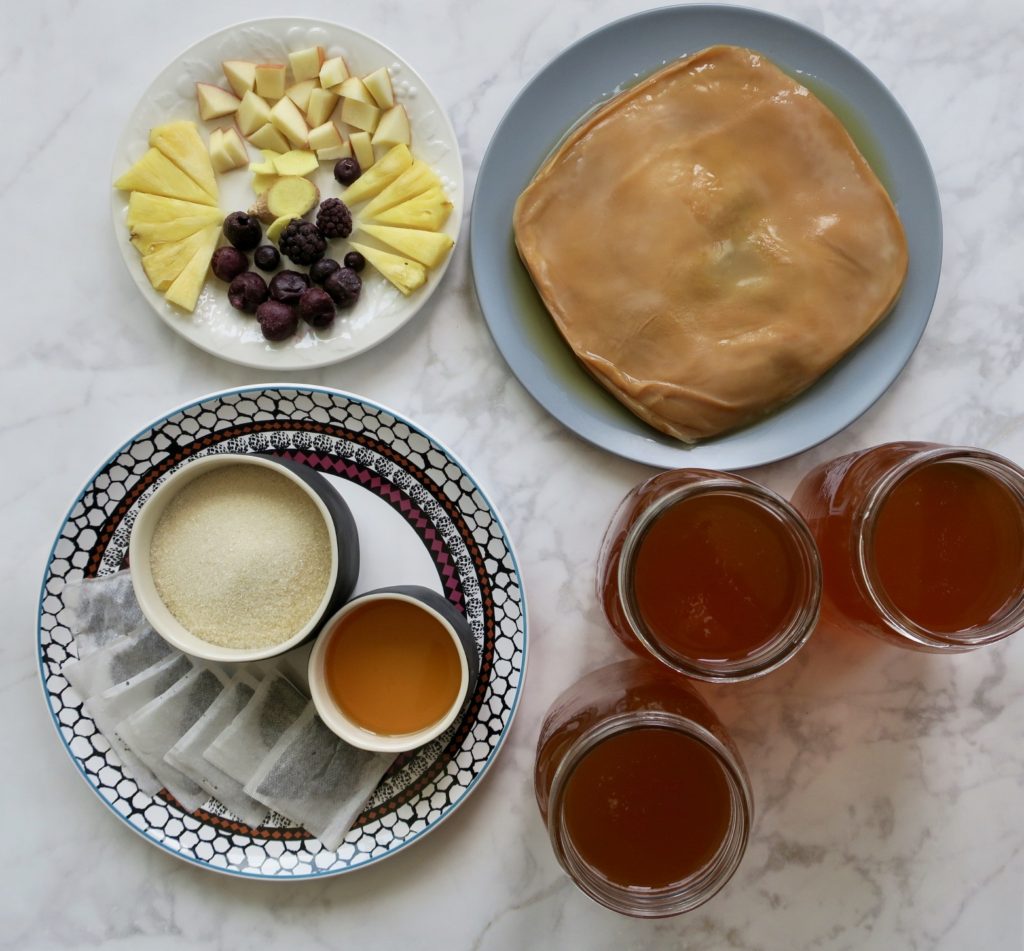
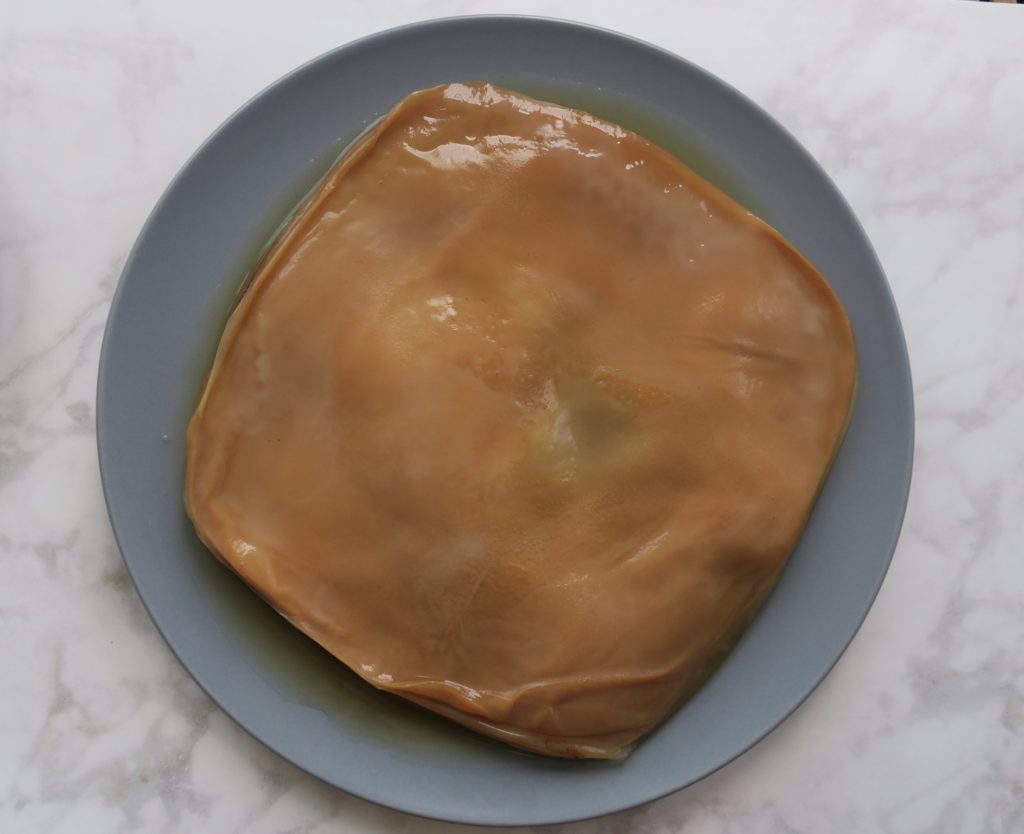
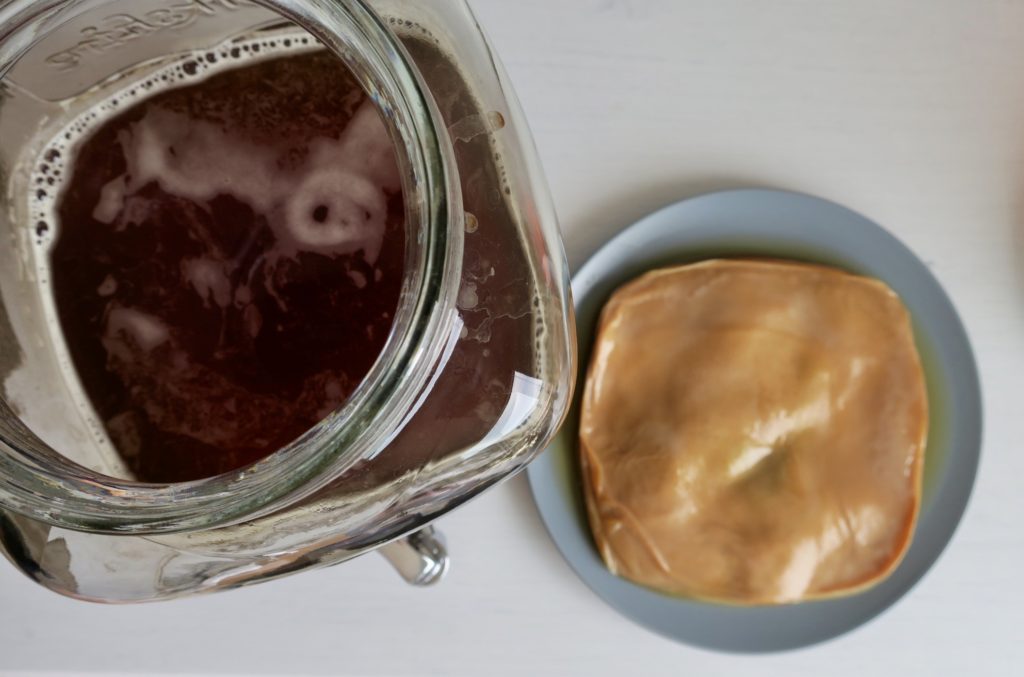
Scoby stands for “symbiotic culture of bacteria and yeast”… AKA the Mother. It’s actually a living culture that looks like a jelly fish mushroom pancake. This culture is the living home for the yeast and bacteria that transforms your sweet tea into fizzy, fermented, refreshing kombucha.
Where do you get a Scoby?

There are 3 ways you can get yourself a Scoby:

  • From a friend who is already brewing their own Kombucha. All they need to do is peel off a few layers (creating one thick layer) of their own Scoby, and transfer it to you with some of the liquid from their the batch. The Scoby likes to be smooth-side up (you’ll notice a smooth side and a rough/stringy side). You can transfer it in a zip-lock bag (which you will rinse and re-use, of course;) then get it into your glass jar with the rest of your tea as soon as you can.
  • Buy a Kombucha Starter kit at almost any health food store.
  • Start your own Scoby:
    1. Buy a bottle of raw, unflavoured kombucha at the store.
    2. Pour the raw kombucha into a large glass jar. (Optional – you can create more liquid/food for the Kombucha to ferment in by making 1 cup of black tea with 1-2 tbsp of white sugar, letting it cool, then adding this sweet tea to the jar with the original store-bought boosh).
    3. Cover the jar with a few layers of cheese cloth and secure it with a tight rubber band.
    4. Leave the tea to ferment in a room temperature cupboard for about 7 days.
    5. You should see your Scoby developing on top of the liquid (it will look like a clear film, then become more white and thicker as the time goes by. If you don’t see any sign of a scoby after 3 weeks, discard all of it and start over with a different store bought kombucha. Wait until the Scoby is at least 1/4 inch thick before using it to brew your first big batch of Kombucha! This could take up to 1 month.
    6. Keep your new Scoby and the tea for making your first batch of Boosh.


Benefits of Kombucha:

Just like all fermented things (sauerkraut, kimchi, miso, kefir, tempeh, pickles, natto, coconut yogurt) …

Kombucha has a MEGA-DOSE of benefits!

  • Increases good gut bacteria
  • Contains probiotics
  • Aids digestion
  • Detoxifying
  • Immune support
  • Reduces inflammation
  • Contains antioxidants
  • More energy
  • Cleanses liver
  • Helps with weight loss
  • Helps you sleep better
  • Cancer prevention
  • Hangover helper


How To:

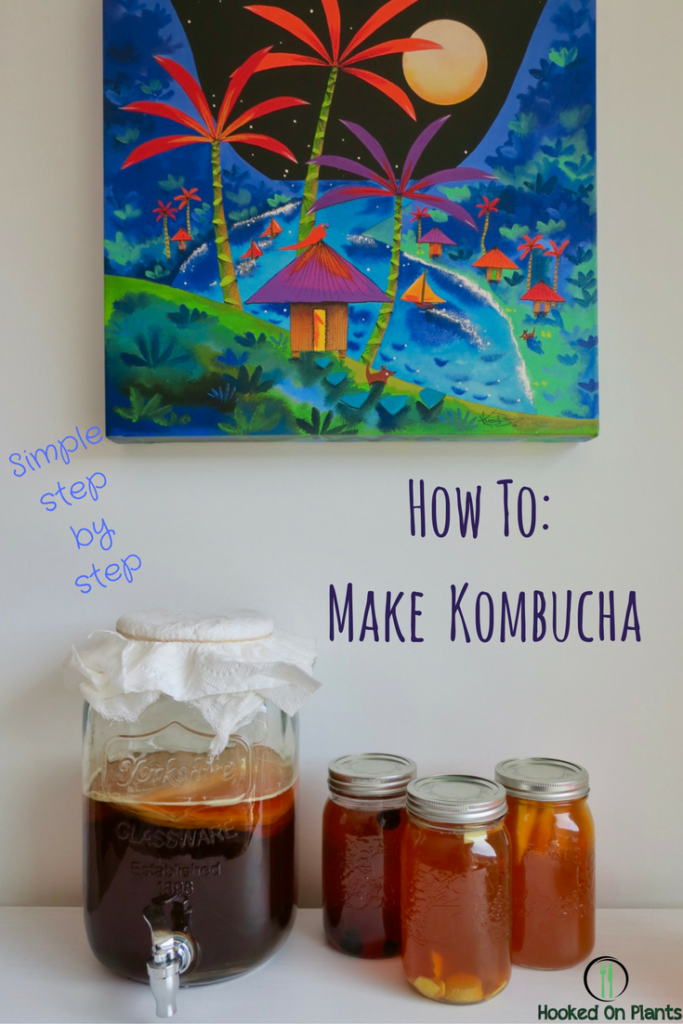
Make Your Own Kombucha

First, a few things to know:

  • Every batch tastes a bit different. This depends on brewing time, temperature, and the strength of the tea. This is all part of the excitement.
  • Always have clean, non-soapy hands when handling the Scoby and the glass jar.
  • Use hot water to wash the glass jar (AKA the Scoby’s home). If it still looks grimy, use white vinegar with hot water every few washes. No soap.
  • For the batch liquid, use filtered water, if possible. Tap water from Whistler works well for me though!
**Scroll further down for Step-by-step with photos**
Prep Time: 15 minutes
Waiting Time: 10-25 days
Servings: 3-4 large mason jars
What you’ll need:
  • cheese cloth (enough to cover the top of your jar, folded over 3 times)
  • elastic
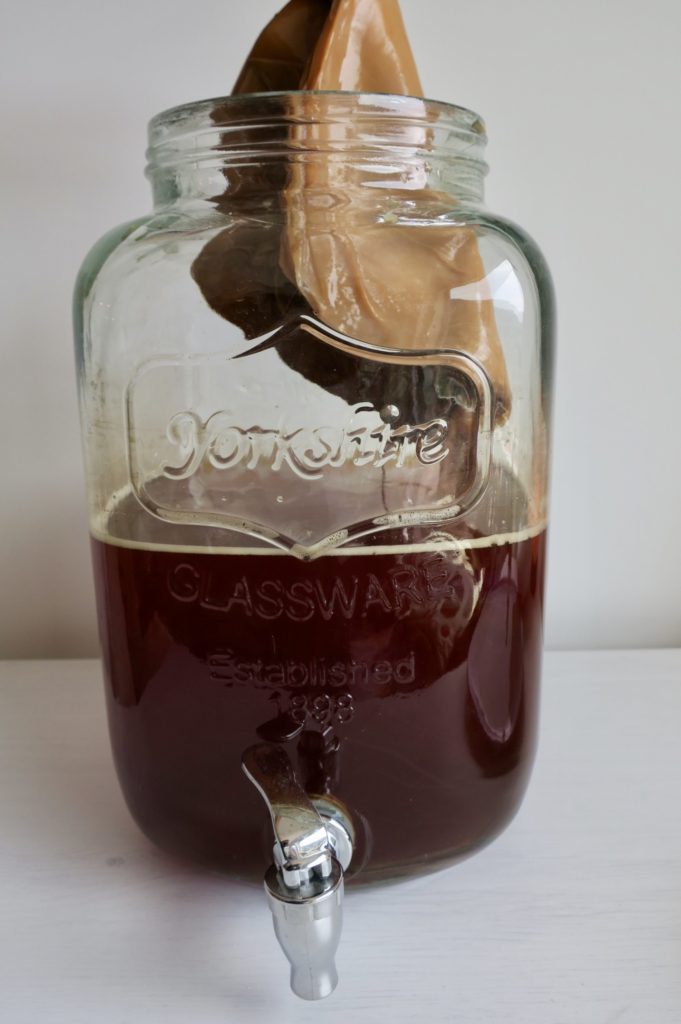
  • large glass jar (try to get one without any metal spout- it doesn’t work anyways because the Kombucha clogs it- and make sure it’s all glass!)
  • 4 large mason jars
Ingredients:
  • 7 bags of organic black tea
  • 1.5 cups of organic white sugar (don’t worry, the Scoby will eat most of the sugar up while it ferments)
  • about 16 cups of water, as clean as you can get it (filtered is best, but my Scoby doesn’t mind Whistler tap water)

Directions:

  1. Bring 4 cups of water to a boil in a pot
  2. Once boiling, turn off the element
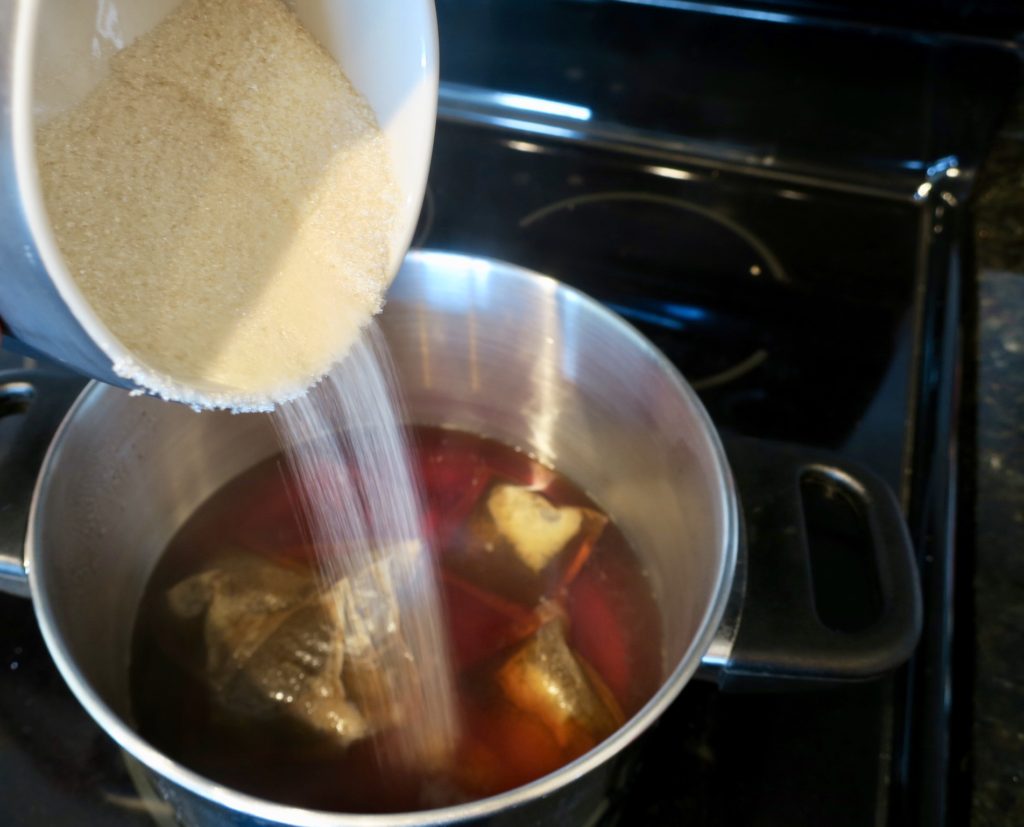
  3. Add the 7 black tea bags and the sugar to the water, and stir
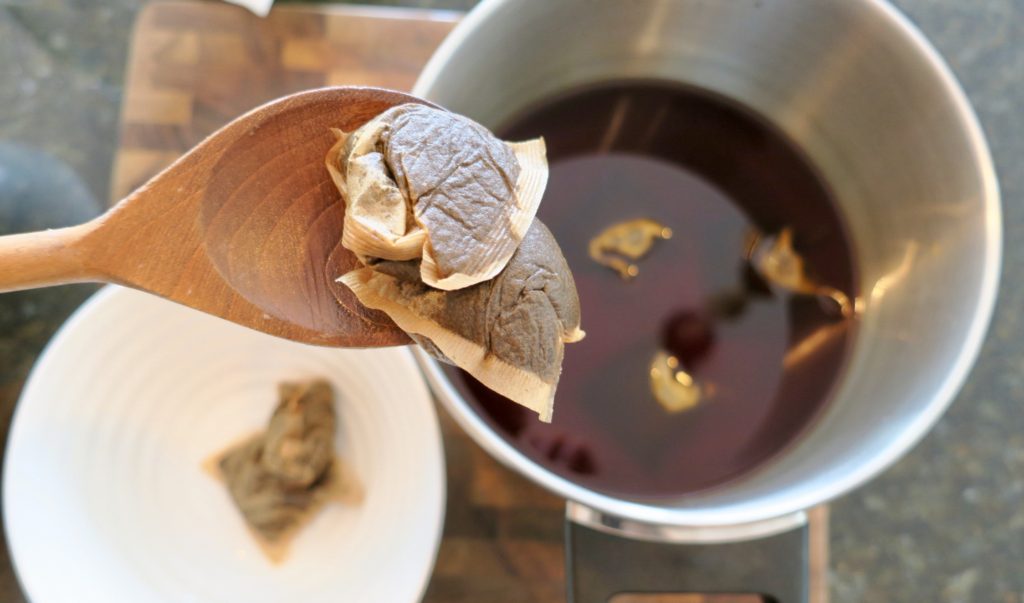
  4. Let the tea sit and steep for 10 minutes
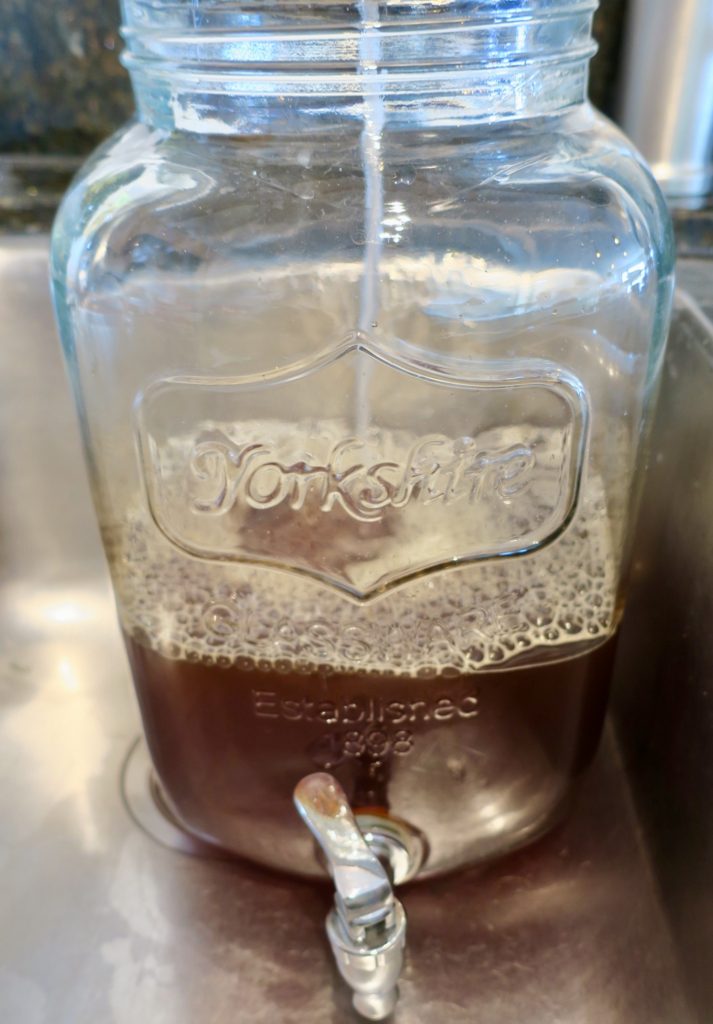
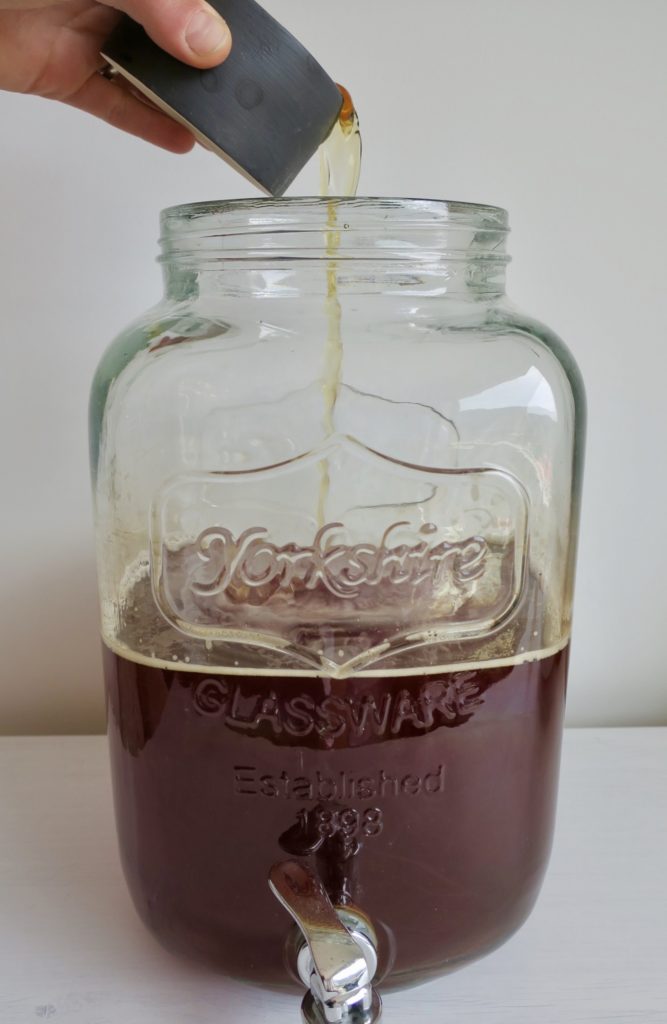
  5. Pour the hot tea into the large glass jar
  6. Fill the jar up with 14 more cups of cold water
  7. Place the Scoby in the water, rough side down, smooth side up
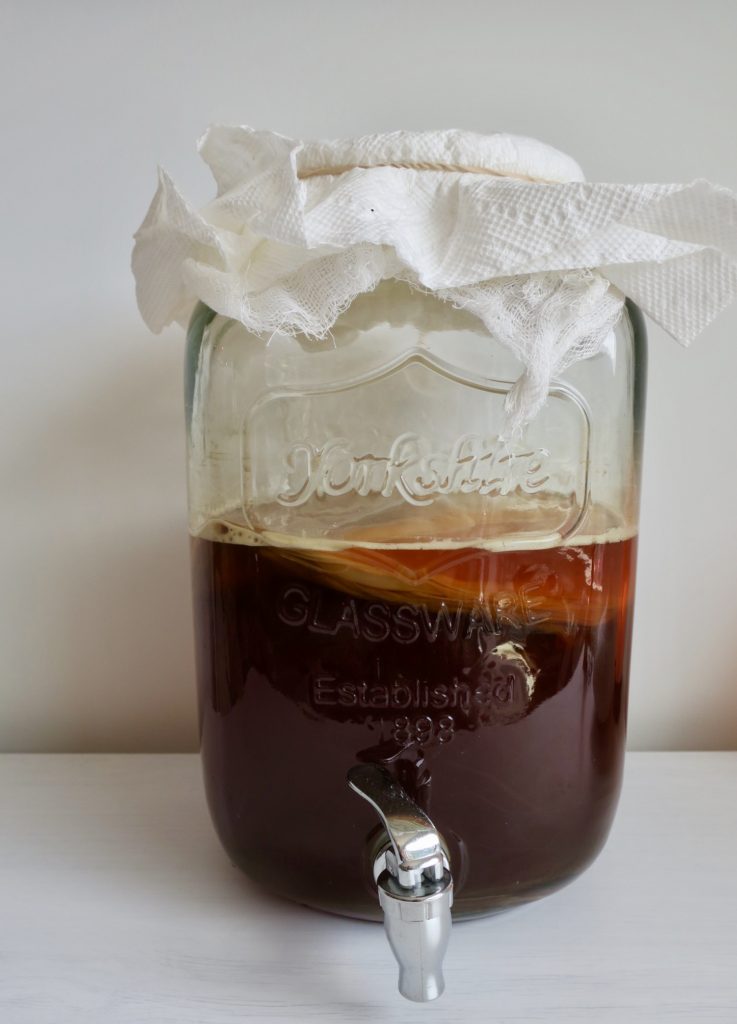
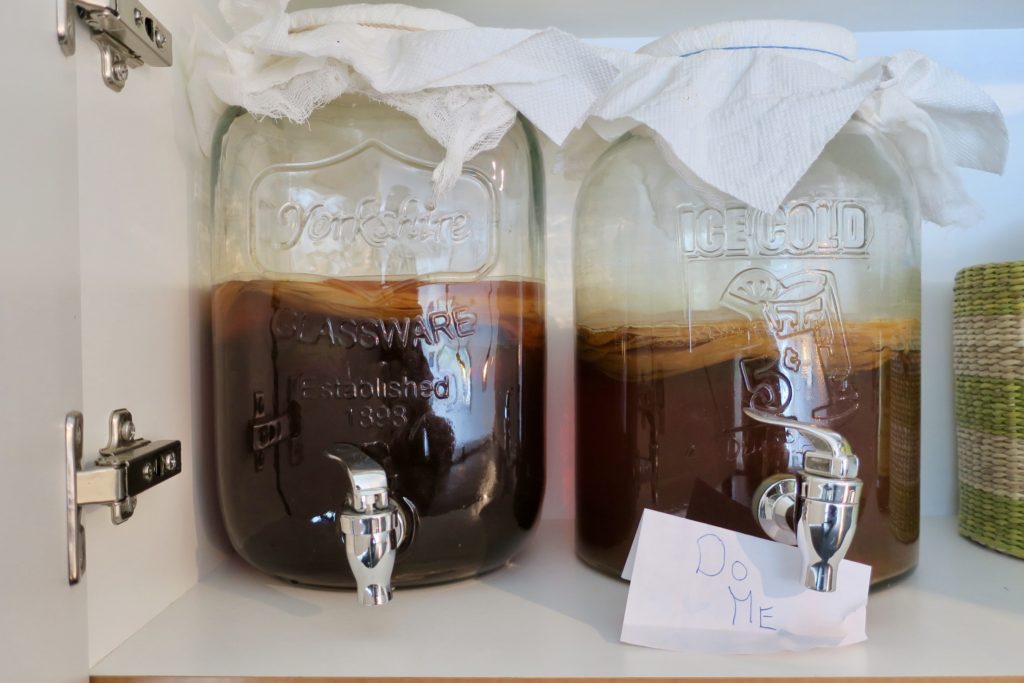
  8. Use a few layers of the cheese cloth as a lid with an elastic
  9. Place the jar of Kombucha in a cupboard or pantry for 10-20 days
    (At day 10, taste it to see if its bubbly- if not, leave it for a few more days until you like the amount of bubbles !)
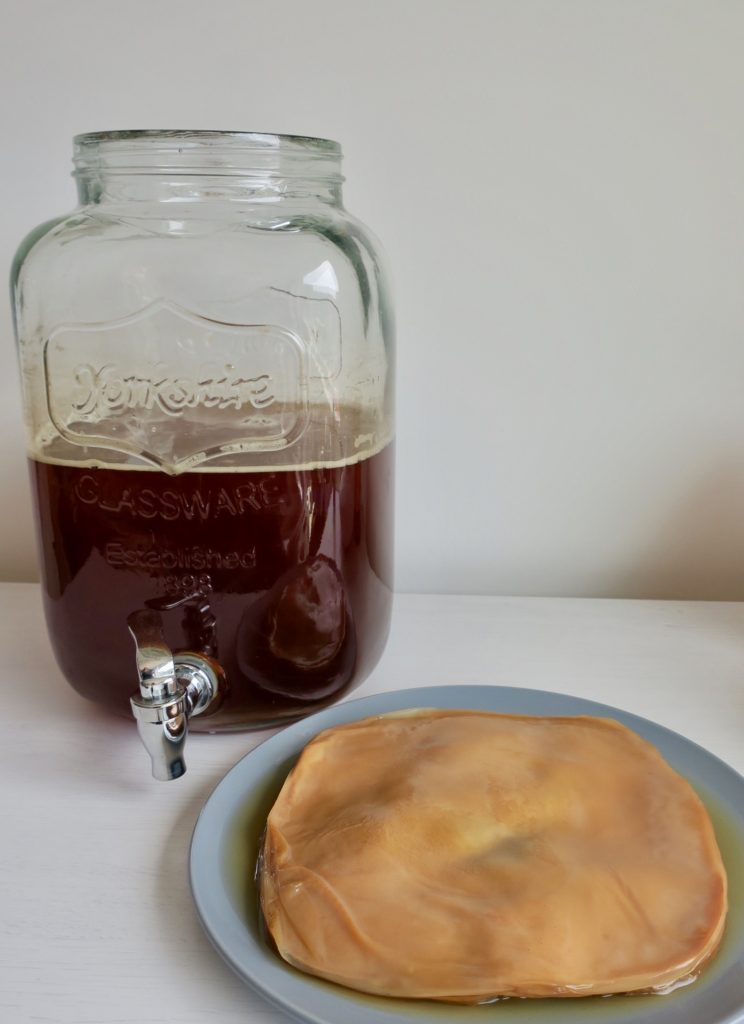
  10. Once it’s finished fermenting to your liking, carefully take the Scoby out and place it on a plate (rough side down) while you get the next batch ready.
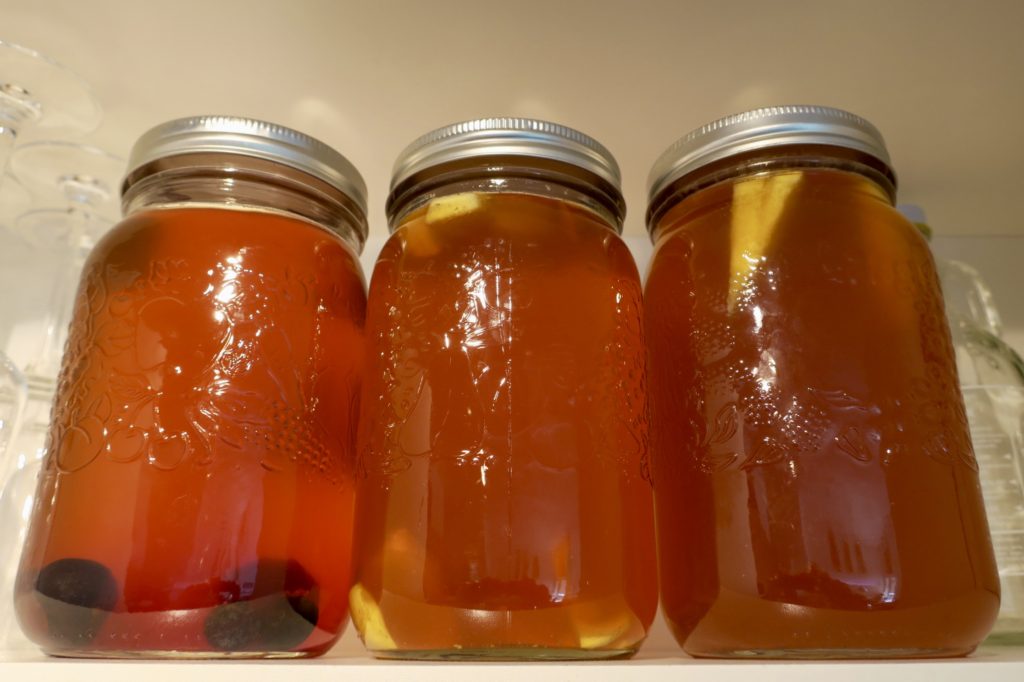
  11. Pour the Kombucha into mason jars. You can tighten the lids, keep it in the fridge and drink it as is  OR carry 0n to the next step…
  12. This is optional, but makes the Kombucha even more bubbly and delicious.
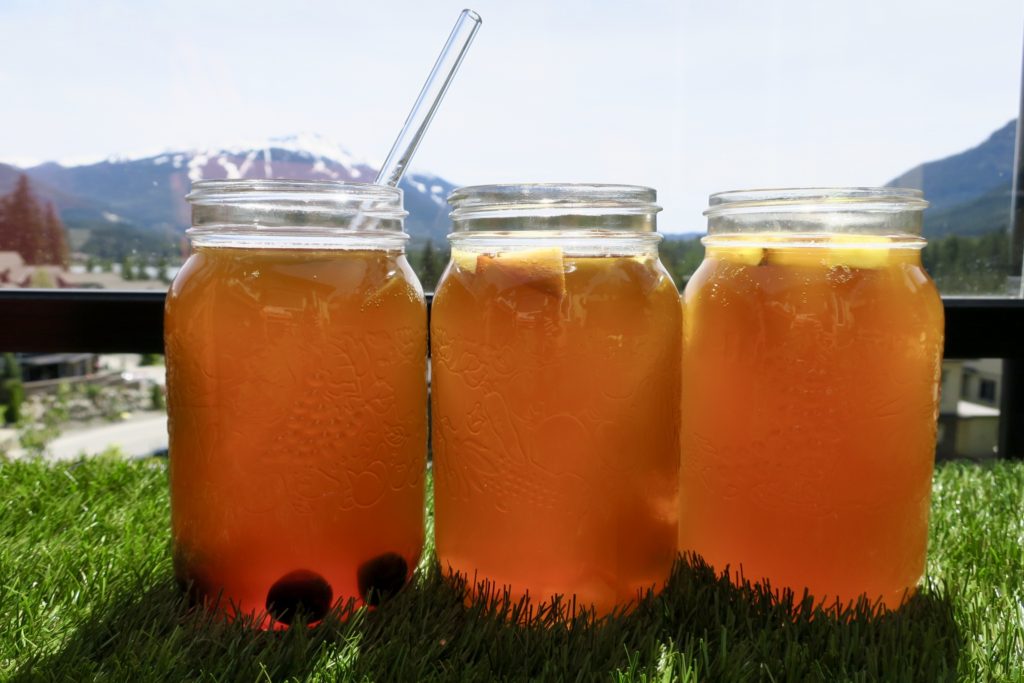
    • Secondary Fermentation – add flavour your mason jars by adding fresh ginger, 1 tsp of maple syrup, fresh fruit chunks or purée, or fresh herbs. Tighten the mason jar lids and leave them in the cupboard for 1-3 days. This will create a more carbonated and flavourful Kombucha. Then, place them in the fridge to halt the carbonation.


    **Step-by-step with photos!**


Once the water is boiling, add organic sugar and tea bags.

Remove the tea bags after 10 minutes

Picture

Pour the hot, sweet tea into your large glass jar

Fill the jar with about 12 more cups of water

Add a little bit of the last batch’s liquid

Place the Scoby, smooth side up, into the liquid

Cover with a cheese cloth and rubber band, and place into your cupboard away from the sun for 10-20 days (I have 2 jars that I rotate between every 2 weeks).

Once it’s fizzy and ready, remove the Scoby with a bit of the liquid, set aside, then pour the Kombucha into air tight jars.
Place the mason jars in a cupboard to secondary ferment along with fruit, maple syrup, or herbs for 2 days.
OR just put them in the fridge! They’re ready to drink now, but won’t be quite as bubbly or flavourful without the secondary fermentation.
Nice work brew master!
Since the Scoby is a living culture, don’t forget to talk or sing to the Scoby to keep it happy!
Too hippy for you?
Ok, just enjoy the refreshing boosh you have just created.

Filed Under: Drinks, Raw, Recipes, Salt Free, Snacks, Uncategorized Tagged With: at home kombucha, boosh, fermented beverages, ferments, how to brew kombucha, kombucha, kombucha brewing, make your own kombucha, raw, raw drink, secondary fermentation

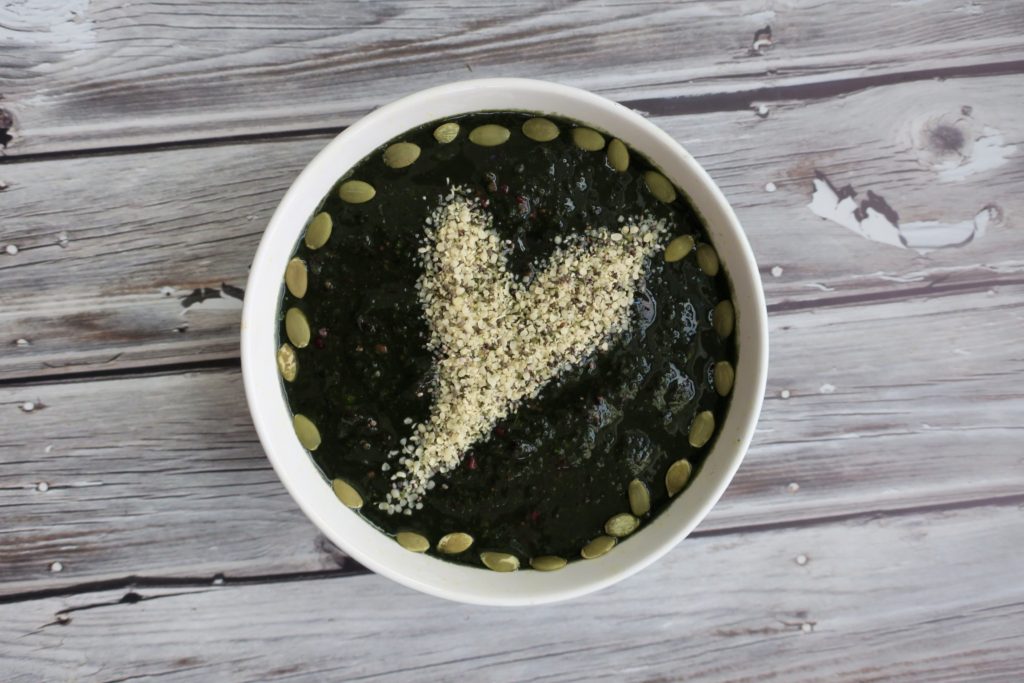
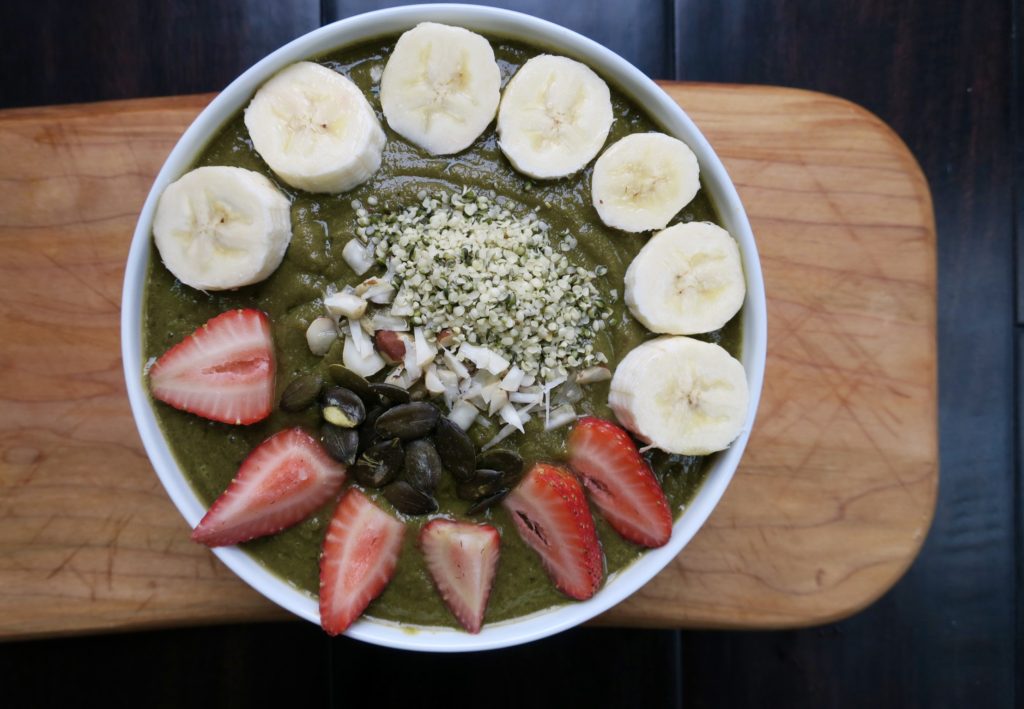
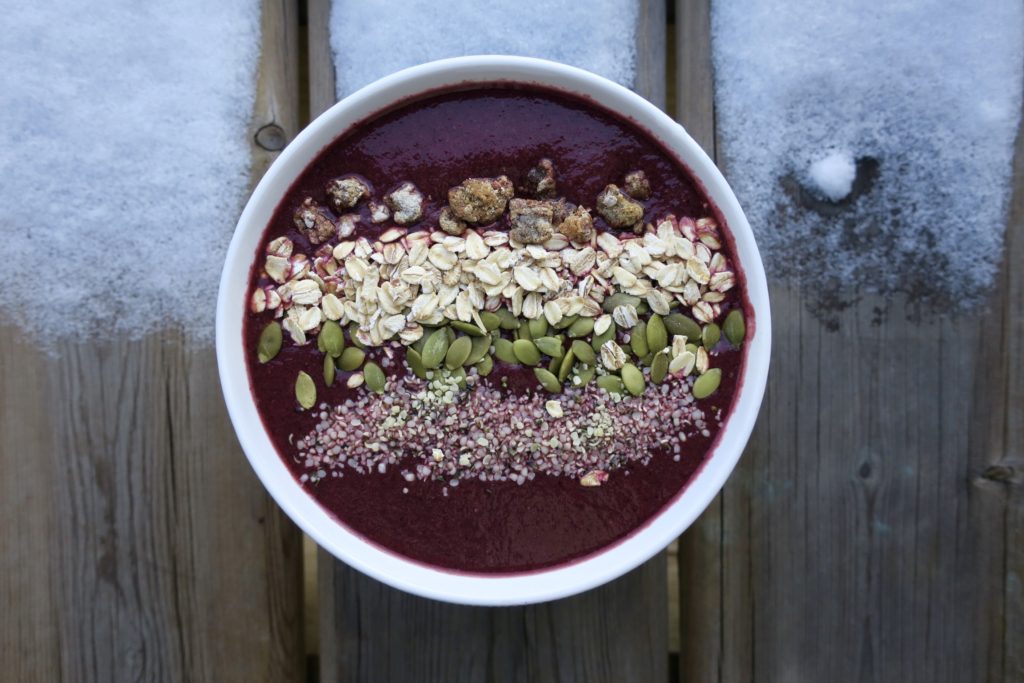
The Perfect Smoothie Bowl

June 1, 2017 By julia

The secret to the perfect smoothie bowl?


Creativity, nutrient-dense ingredients, experimentation and love.

Simple right?

I make smoothie bowls for breakfast, lunch, even dinner sometimes on those lazy but clean-feelin’ days. What could be easier?

Why eat your smoothie with a spoon???

Smoothies are amazing, but usually they slide down the hatch too fast.

The digestion process for carbohydrates (which include fruits and vegetables) starts in your mouth. The process of chewing creates saliva with the necessary digestive enzyme, amylase to begin the breakdown process of carbohydrates. So, the more you chew your food, the more surface area it creates, and the more easily digested and assimilated your nutrients are. This is why it is extremely important to slow down, chew as much as possible, and breathe between your bites. Good digestion leads to weight loss, efficient nutrient absorption, more energy, less bloating, and the prevention of disease. YAY for all of that.

So, it’s great to create smoothie bowls, rather than downing a smoothie, because this forces you to slow down your consumption, and actually chew your smoothie one spoonful at a time! Plus, it’s even more satisfying to have that spoon to mouth action.

If you just don’t have the time to create and devour a bowl of smoothie goodness, then just take it in a to-go cup and remember to chew it before you gulp it.

Go for it and switch up the ingredients for a variety of nutrients, vitamins, and minerals.

Just stick to these proportions and you’ll have the best bang for your nutrient buck, plus a delish smoothie bowl every time!

Why are smoothies SO AMAZING?

  1. They’re the easiest way to hide a salad-worth of greens on yourself.
  2. They are pretty much a delicious tasting, massive multivitamin.
  3. They still contain the fibre and water from the whole-food ingredients they’re made of.

TIPS:

  1. Pack your blender with as many greens as possible (for the easiest blending, put these in first, so they are pressed down with the other ingredients).
  2. Use the fruit as a way to mask any bitterness of the greens.
  3. If you’re on the run and need to make it into a smoothie – just fill the blender up 3/4 of the way with water, pour it into your to-go cup, and add in something like cacao nibs, seeds, buckwheat groats, to chew on. This is a great way to get in the habit of chewing your smoothies.


Proportions for a nutrient-dense, tasty smoothie bowl:

  • Packed greens = 3/4 of the blender  (spinach, kale, romaine, celery, cucumber)
  • 2 ripe frozen bananas (add a couple more if you want a soft ice cream consistency, or need more sweetness and calories)
  • 1-2 cups of berries
  • Water or plant-based milk = 1/8 of the blender
  • 1 tbsp of your favourite greens powder (optional)

Use your blender’s tamper while you blend it up to help move things along and become smooth.

Optional 1 tbsp add-ins to blend:

~ Ginger: immune-booster and antibacterial (about 1 cm thumb fresh, or 1 tsp powder)

~ Turmeric: nature’s best anti-inflammatory (about 1 cm thumb fresh or 1 tsp powder)

~ Molasses: for hair, nails, bones and iron levels (about 1 tbsp)

~ Adaptogenic herbs like maca, astragalus, ashwaganda, shisandra, rhodiola: all of these restore your body by bringing it back to homeostasis/balance after stress (about 1 tbsp)

~ Medicinal mushroom powders: high in antioxidants and healing properties (about 1 – 2 tsp)

~ Spirulina and/or Chlorella: micro algae packed with protein, anti-inflammatory and detoxifying properties (about 1 tsp)

~ Lucuma powder: maple-tasting and packed with minerals and vitamin A (about 1-2 tbsp)

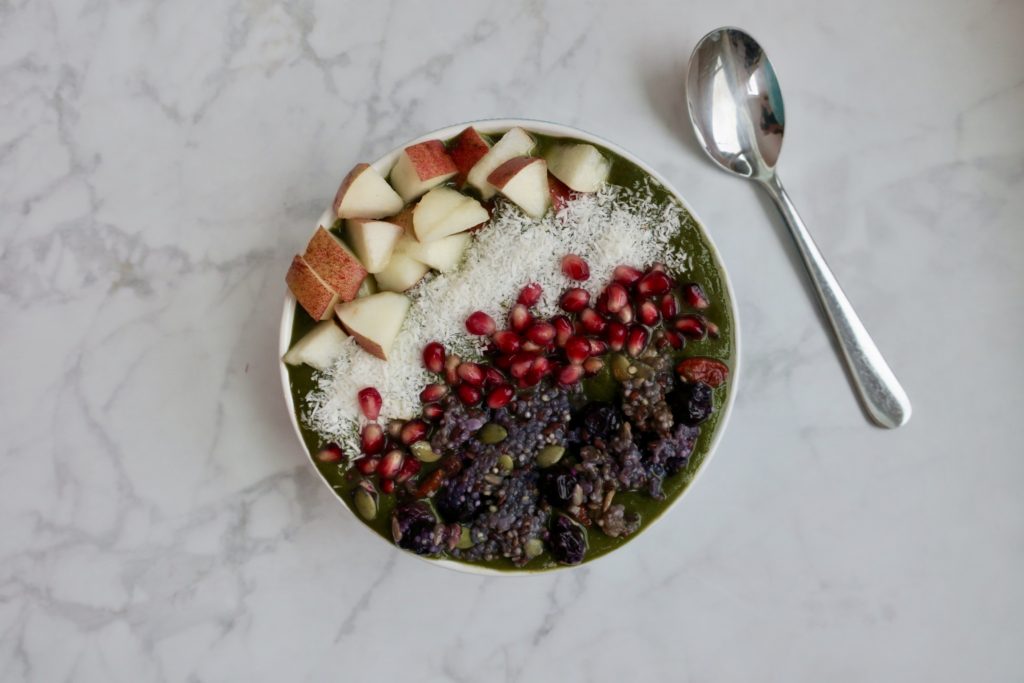
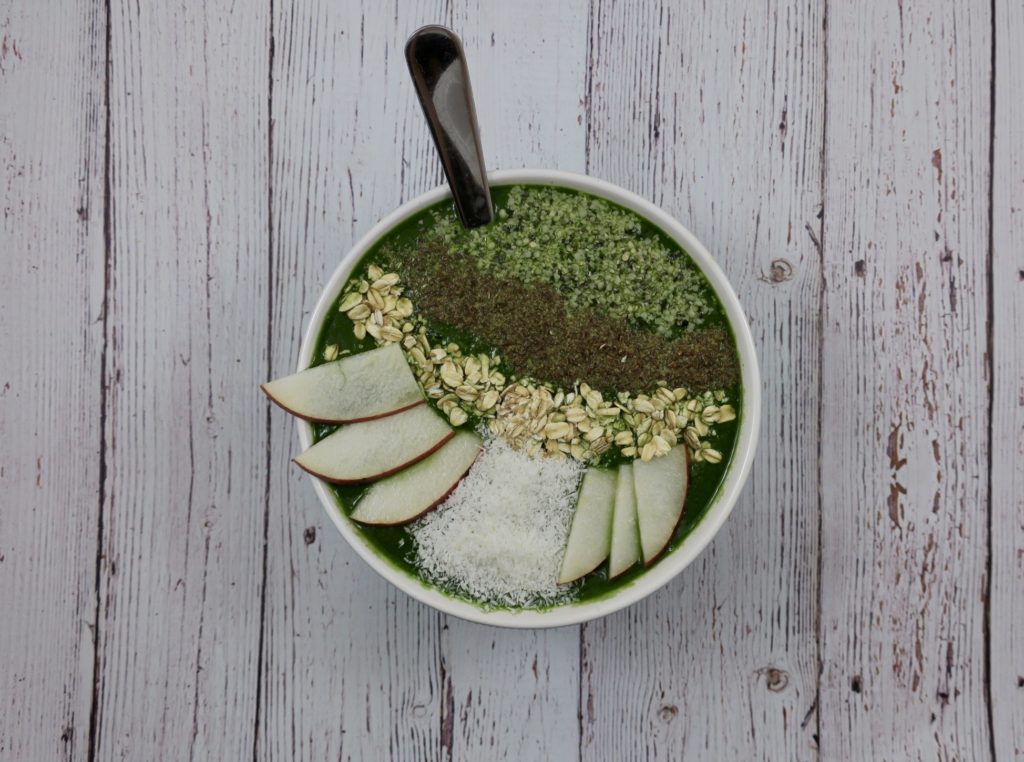
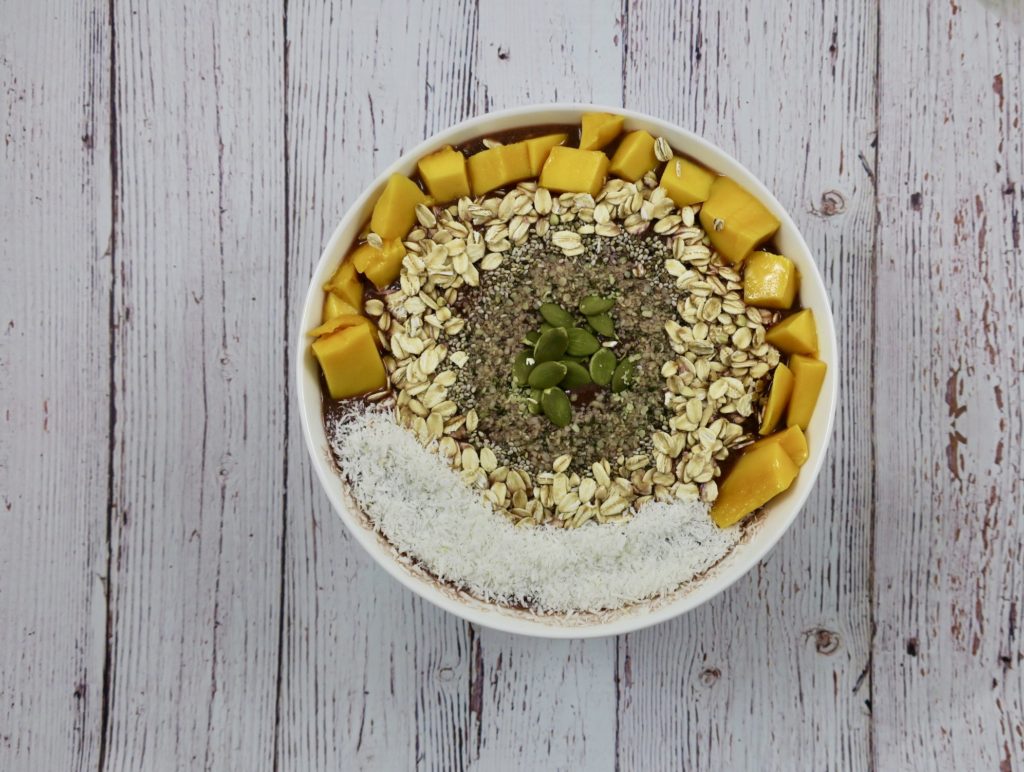
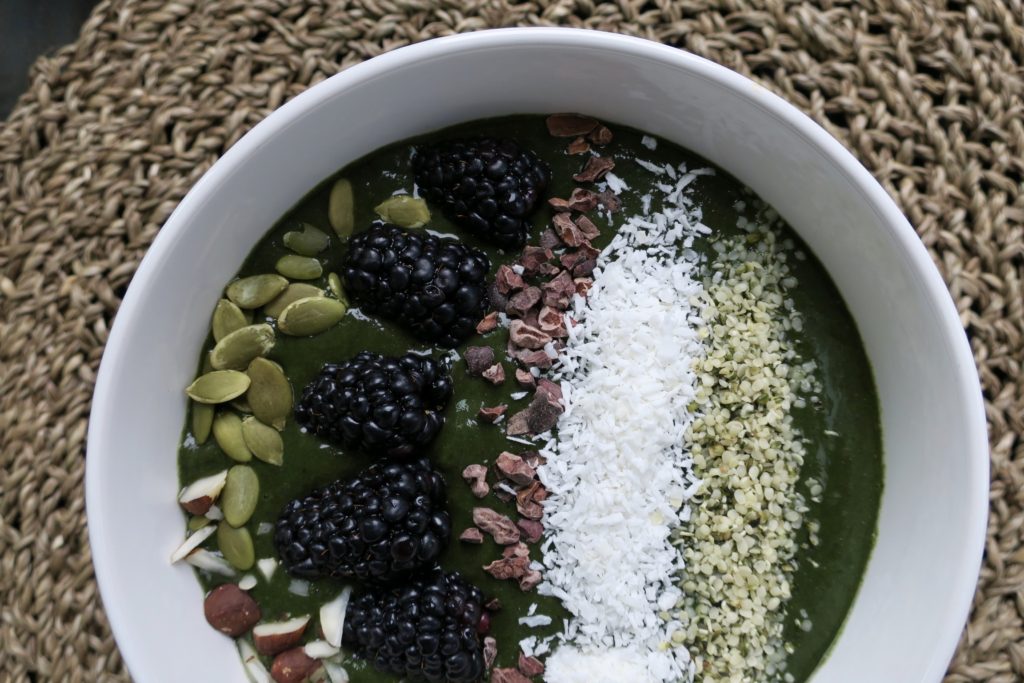
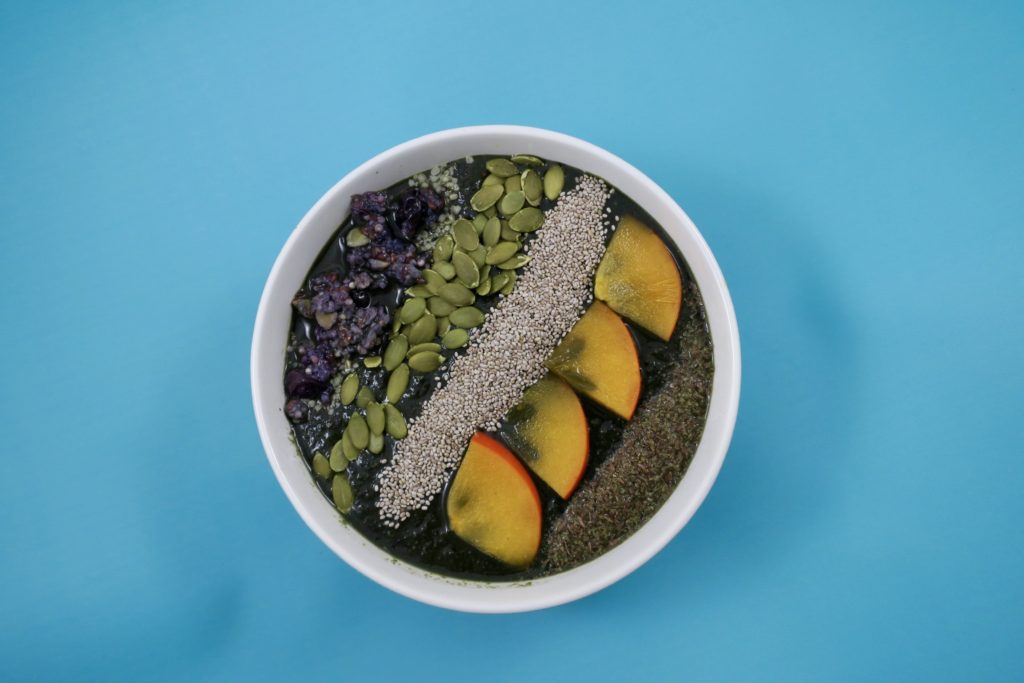
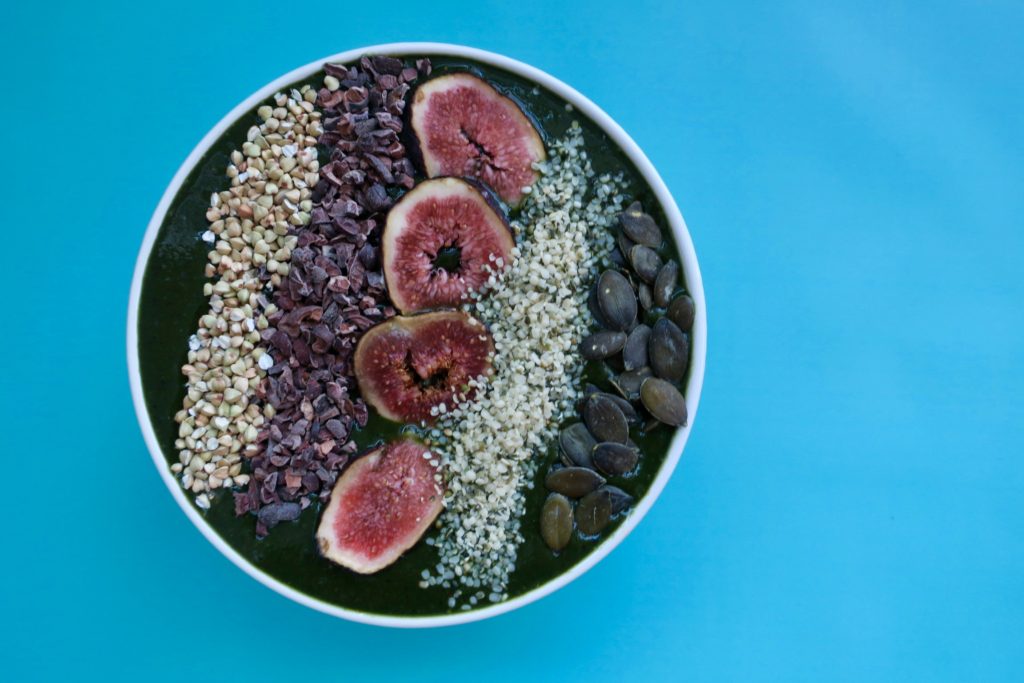
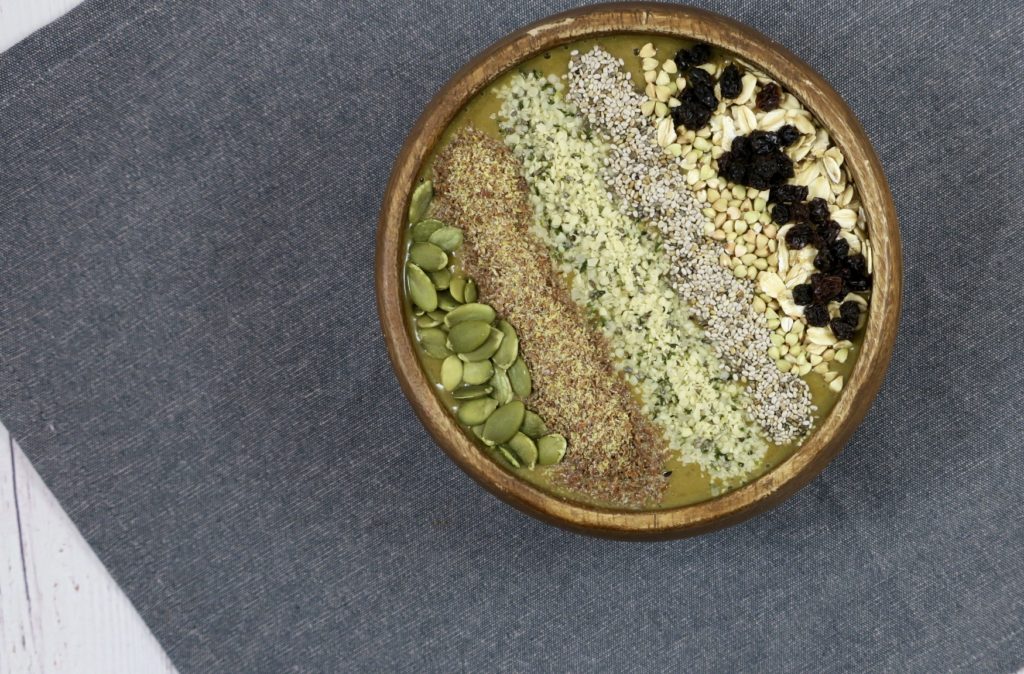
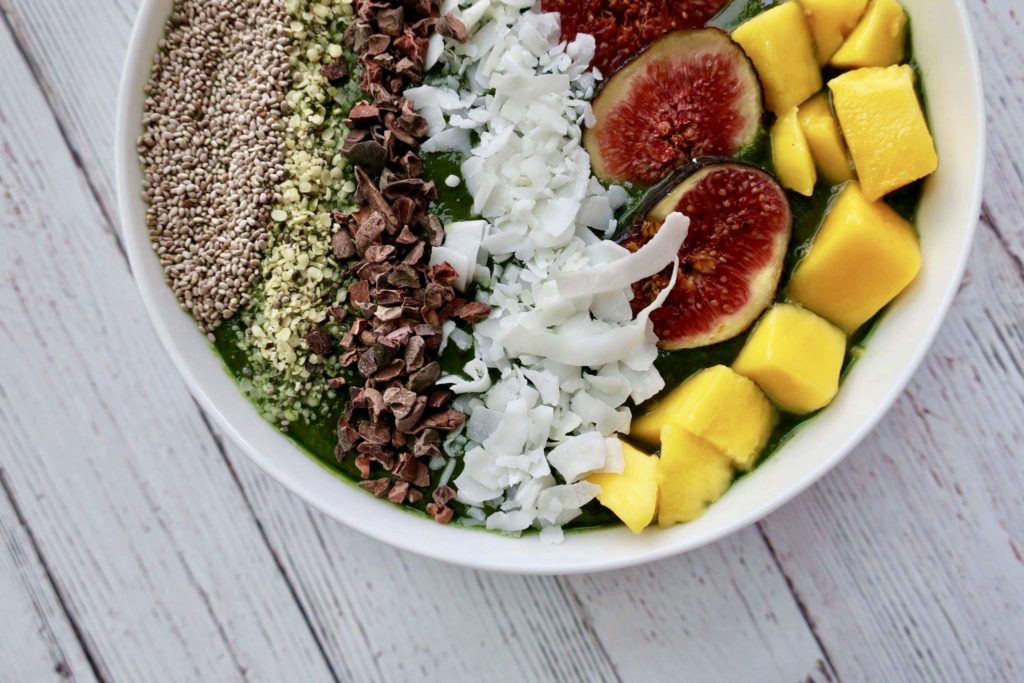
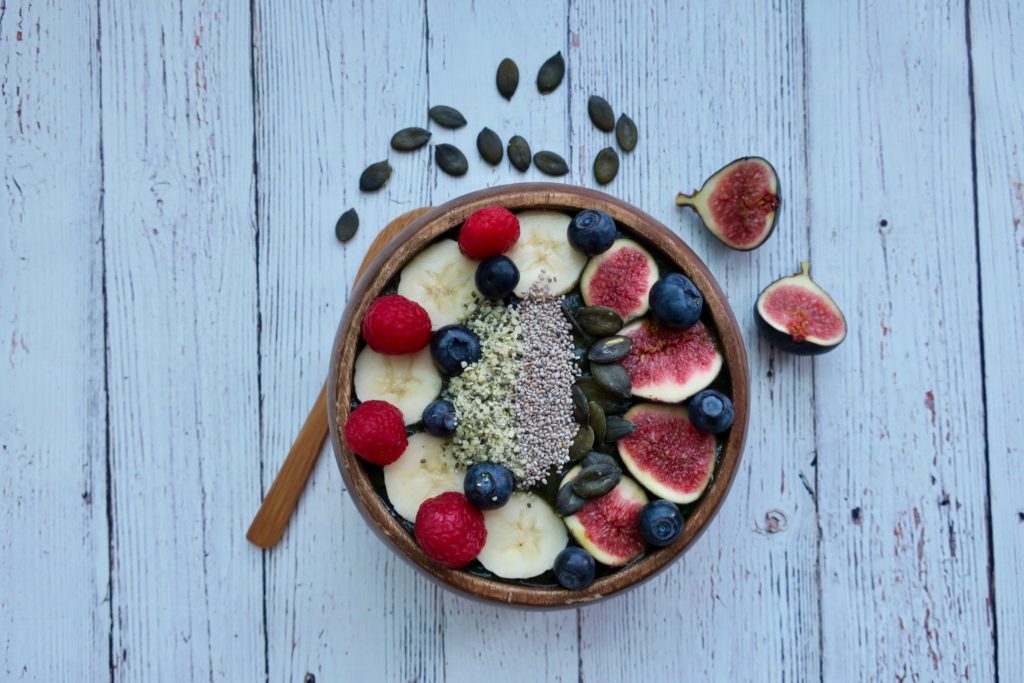
TOP IT OFF

aka

‘make it pretty’:

-Hemp seeds

-Shredded coconut

-Chia seeds

-Pumpkin seeds

-Chopped fruit (banana, pear, persimmon, kiwi, fresh figs….)

-Chopped nuts (brazil nut for selenium is my fave)

-Cacao nibs (for a serotonin and antioxidant-boost)

-Buckwheat groats (for a protein punch and some crunch)

-Rolled oats

–Jules Fuel (my pre-made superfood quinoa breakfast oatmeal)


Happy smoothie chewing!

Filed Under: Appetizers, Breakfast, Gluten Free, Lunch, Oil Free, Raw, Recipes, Salt Free, Snacks, Spring, Summer Tagged With: compassionate food, cruelty free, dairy-free, fruit and veg, gluten free, green smoothie, high nutrient, hooked on plants, nutrient dense, oil free, plant based meals, plant-based, smoothie, smoothie bowl, smoothie chart, smoothie proportions, vegan, vegan breakfast, vegan eats

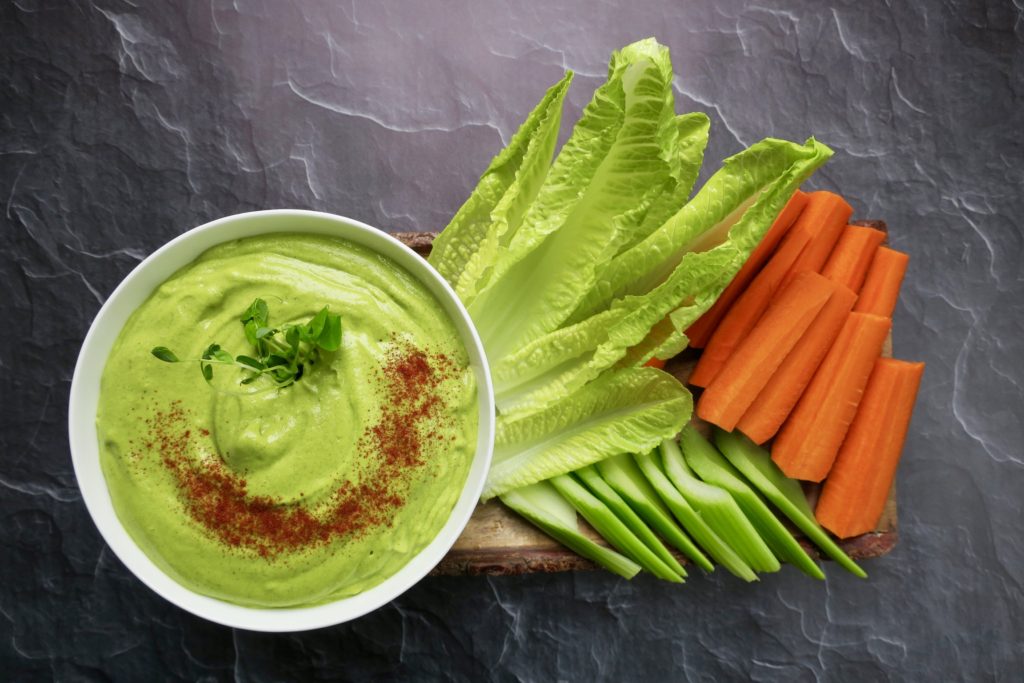
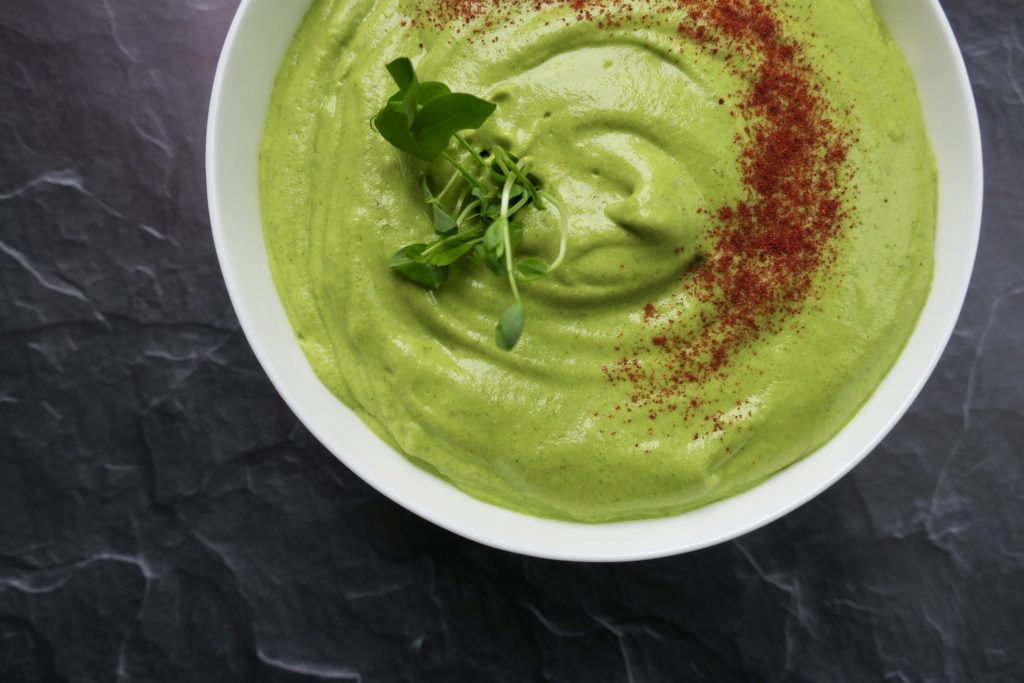
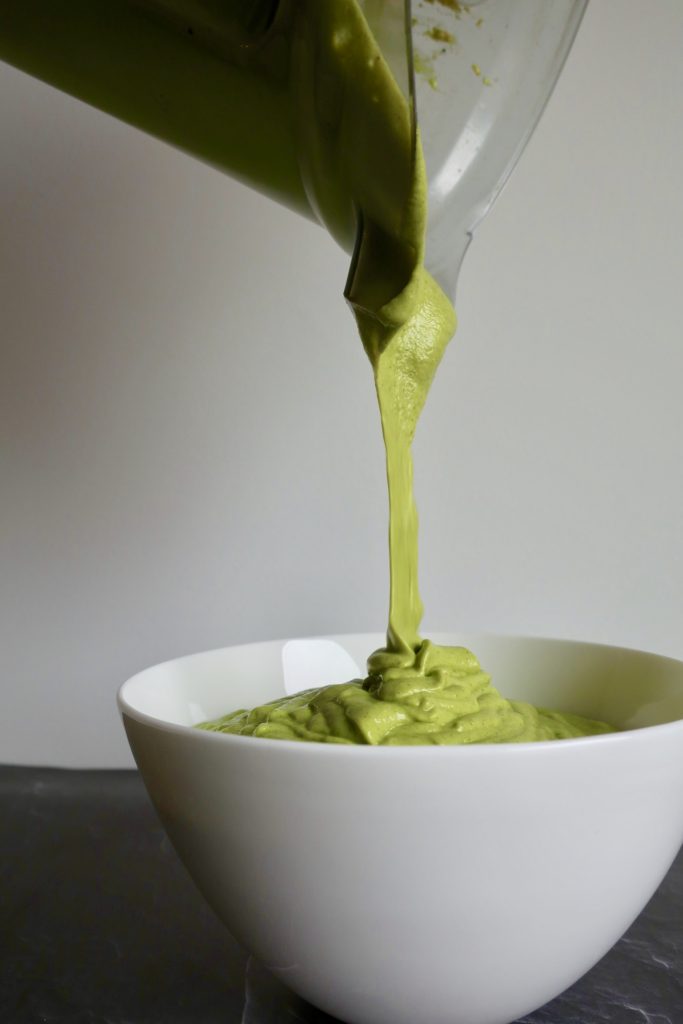
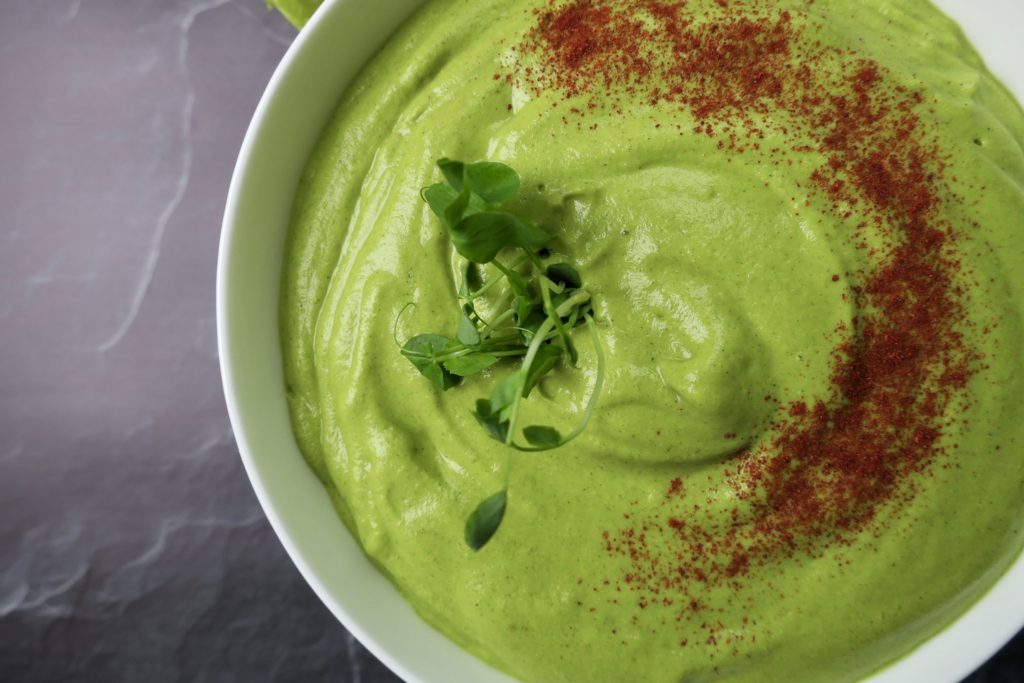
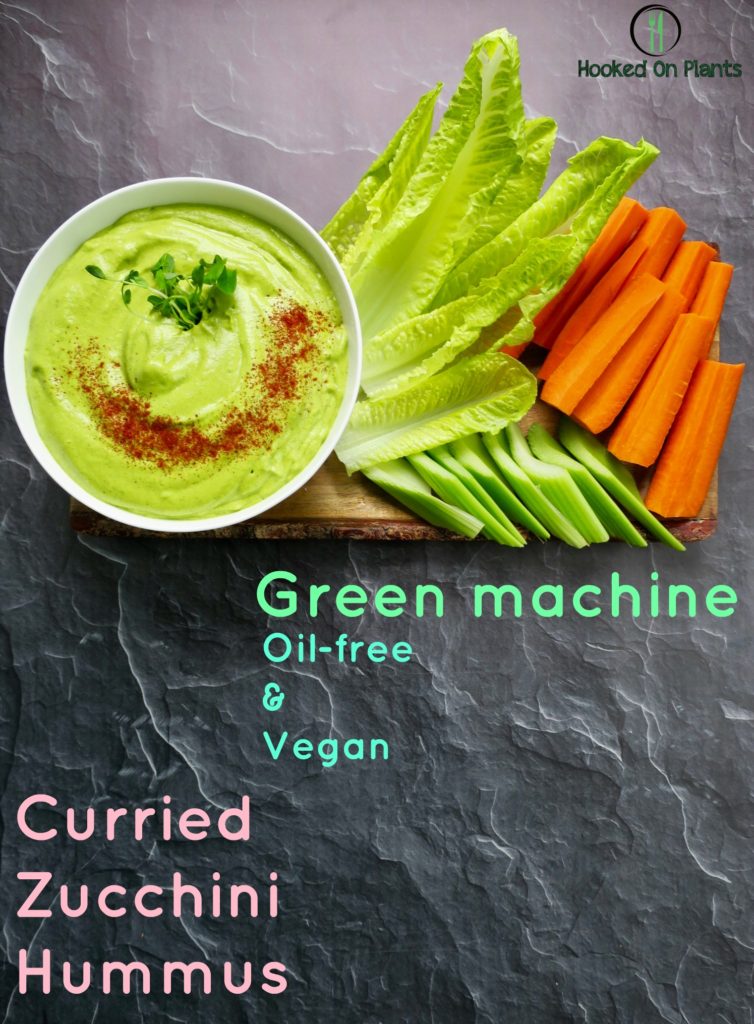
Green Machine Curried Zucchini Hummus

May 18, 2017 By julia

Hummus.

What does hummus mean to you?

… dipping deliciousness. Not just a tiny bowl of deliciousness, but a massive one. There’s something about dipping your food into yumminess that never gets old.

Sometimes your usual chickpea hummus feels too heavy to dip endlessly. That’s why I love this version of hummus.

It’s lighter, greener, and even more dip-able.

It even goes beyond dipping. Use this for pasta or glory bowl sauce, or bring that sandwich to the next level.

This recipe is inspired by the raw food certification I recently finished, taught by Joanne from The Healing Cuisine at Stay Wild Natural Health. 

What an awesome course! We learned about all the raw food goodness.

Fermentation, nut cheeses, raw crackers, dips, sauces, desserts… OH MY.

Eating your food raw means you’re keeping all of the raw enzymes and vital nutrients live and more easily available. Cooking over 118 degrees degrades the nutrient density of most foods. So, the more raw food you can get into your body, the happier your digestion, your immunity, your hormones, & your whole body will be.

Here’s to high vibrating foods.

Benefits:

~ Zucchini, it’s got potassium for your heart, fibre & water & minimal calories for weight loss, vitamin C for your immune system, and vitamin A for your eyes.

~ Sesame seeds are packed with antioxidant, zinc, and calcium which are great for bone health. The calcium also helps combat migraines and PMS symptoms.

~ Curry powder  is great for the prevention of cancer,  heart disease, and Alzheimer’s disease. Plus it eases pain and inflammation, enhances your immunity, and boosts bone health.

Serves: 4-6

Time: 10 minutes

Ingredients:

  • 2 large zucchinis (about 2.5 cups), chopped
  • 3/4 cup sesame seeds
  • juice of 1/2 lemon
  • 2 garlic cloves, minced (or pressed with garlic press)
  • 1 tbsp curry powder
  • 1/2 cup nutritional yeast
  • 1 tbsp maple syrup

Directions:

  1. Blend sesame seeds, nutritional yeast and curry powder into a flour texture
  2. Add the rest of the ingredients, and blend until smooth (scraping down the sides and using a tamper when needed)
  3. Serve with your favourite raw veggies and crackers.

Filed Under: Appetizers, Lunch, Oil Free, Raw, Recipes, Salt Free, Snacks, Spring, Summer, Uncategorized Tagged With: curried zucchini hummus, green goddess hummus, raw appetizer, raw vegan hummus, vegan appetizer, vegan hummus, vegan snack, zucchini dip, zucchini hummus

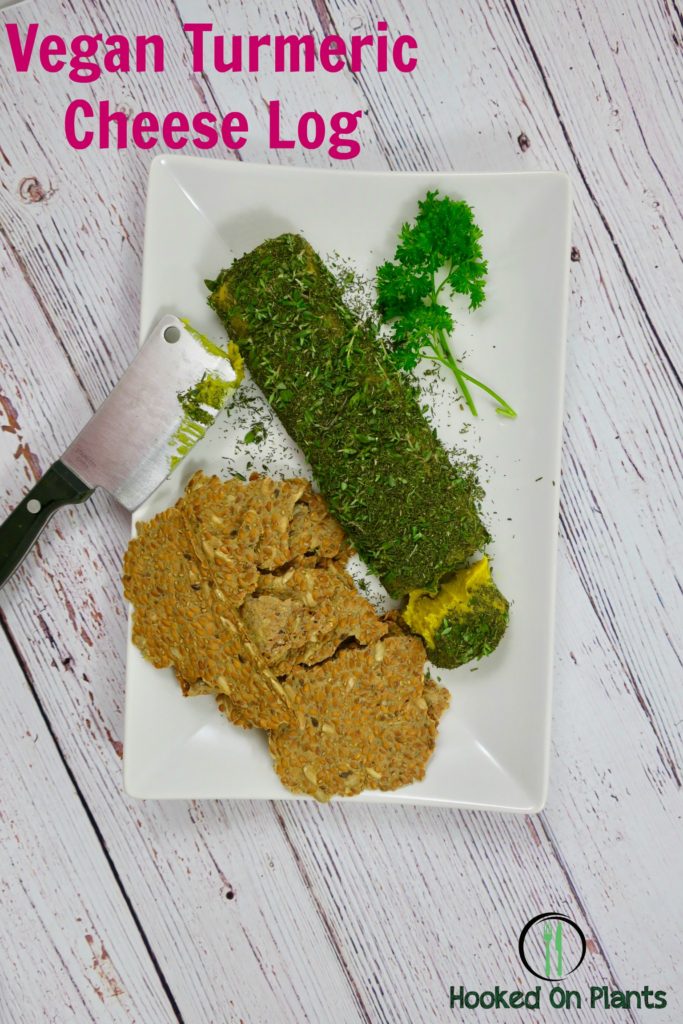
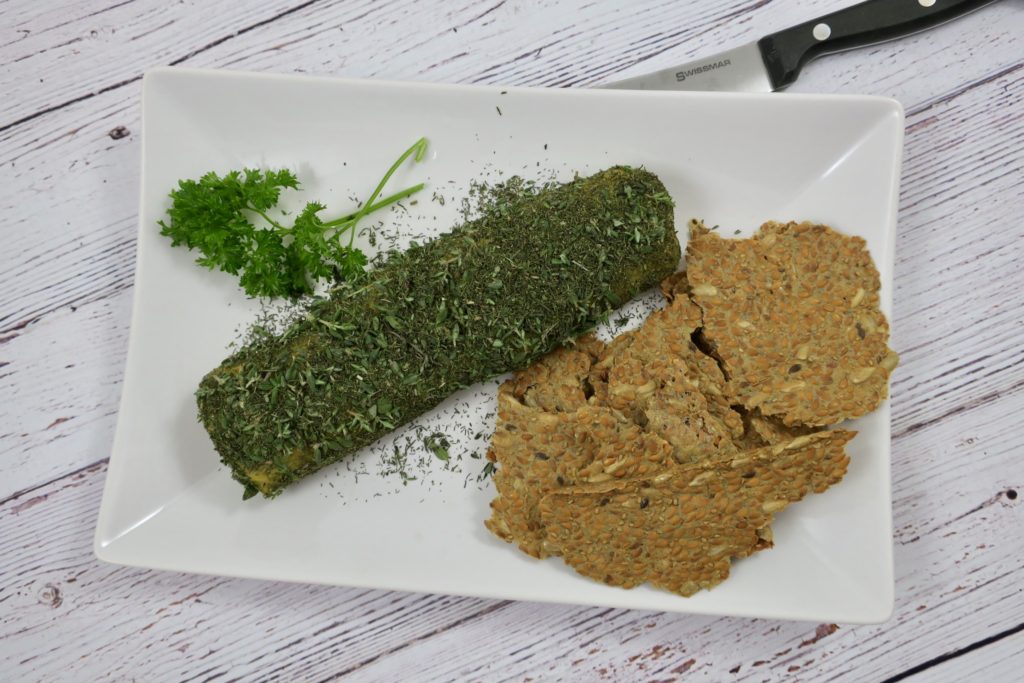
Vegan Turmeric Cheese Log

April 26, 2017 By julia

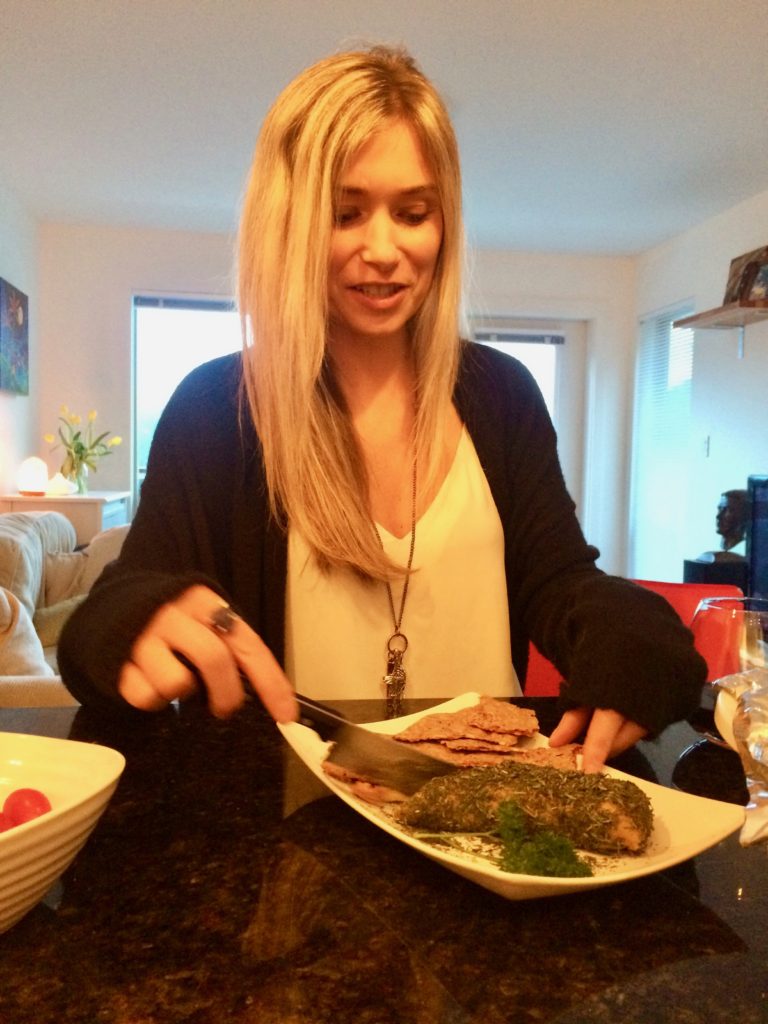
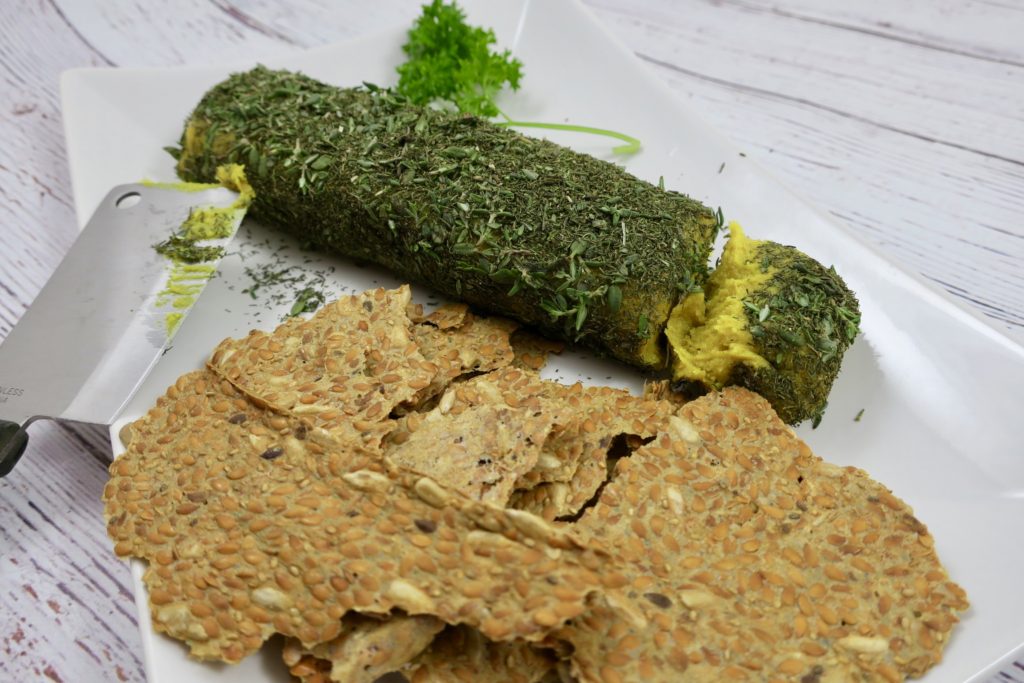
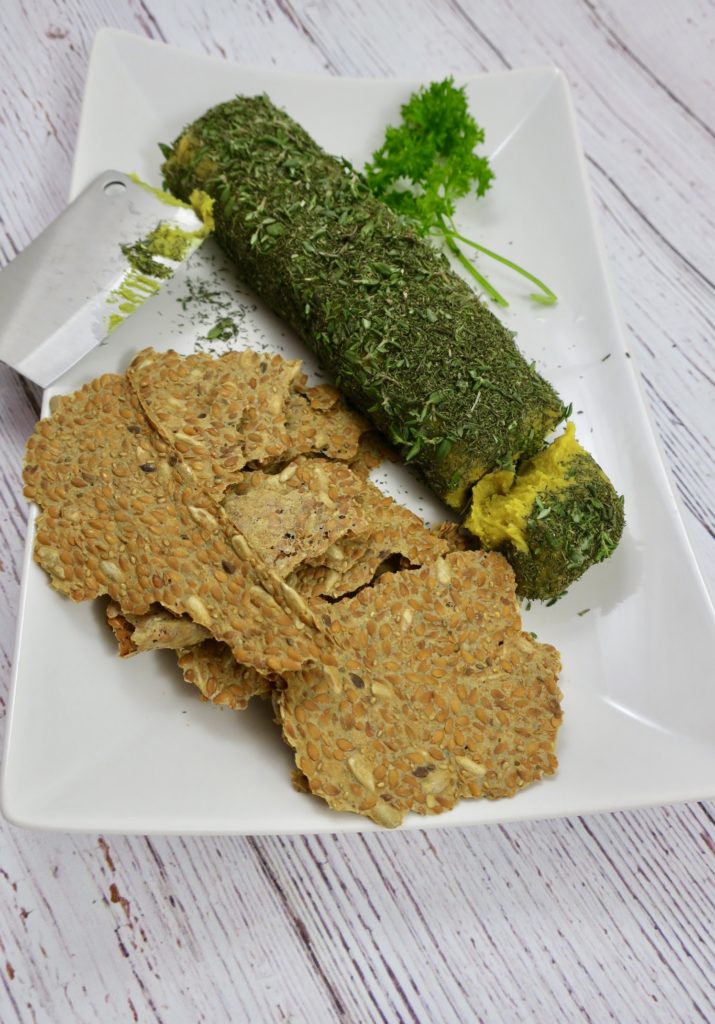
This was a hit as an appy at the last dinner party!

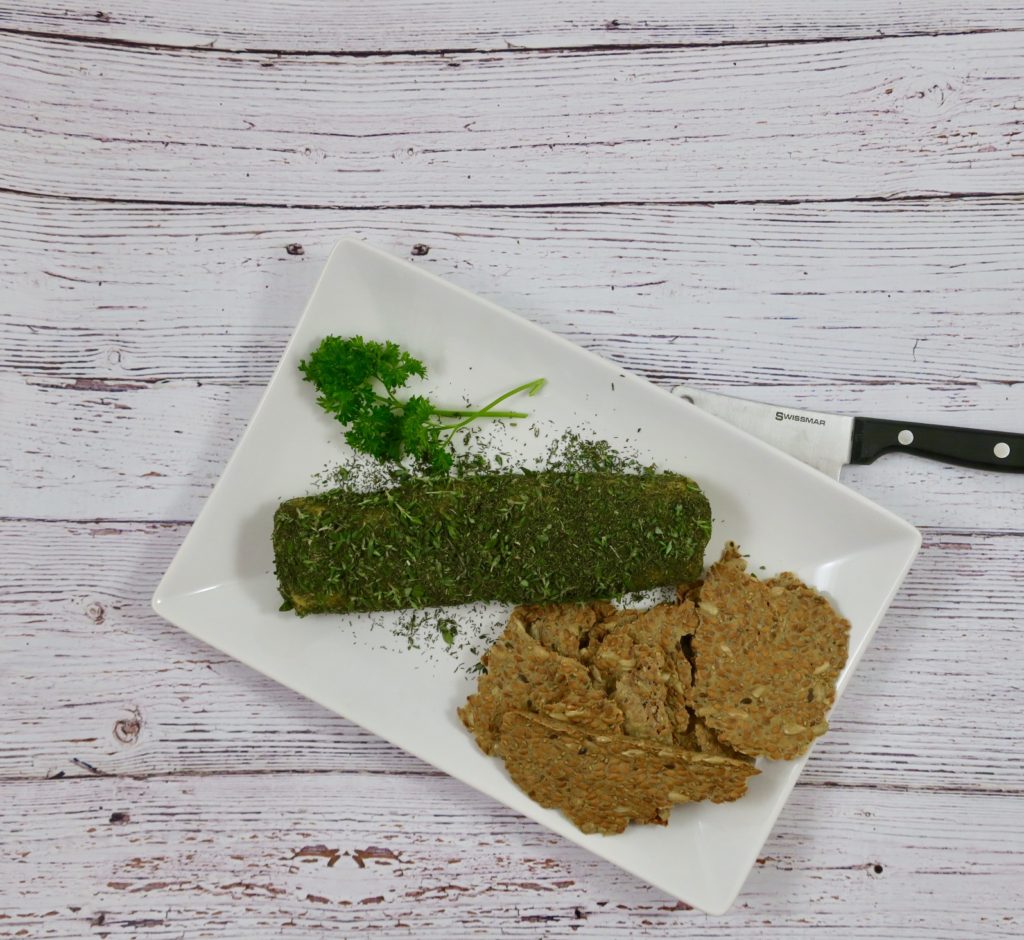
Especially with Eve’s Crackers on the side.

The vegans were all over it, and the surprised words ‘it tastes like cheese’ were heard over and over again from the non-vegans.

Success!

The beauty Holly (who has done some amazing work with Peta over the years) loved it, plus, I was finally able to put the neglected cheese knife to great use.

This version of nut cheese making is the quickest and easiest you will find.

There are longer versions of how to make nut cheeses, some as long as one week of fermenting!

Fermenting the nuts for the cheese will give it more of a tangy, aged cheese taste, but when you’ve got a day to figure out what to bring to impress your pals, this is a great go-to recipe to curb those cheese cravings.

I’d still start it the day before you will be serving it up, just so you get all the soaking time possible.

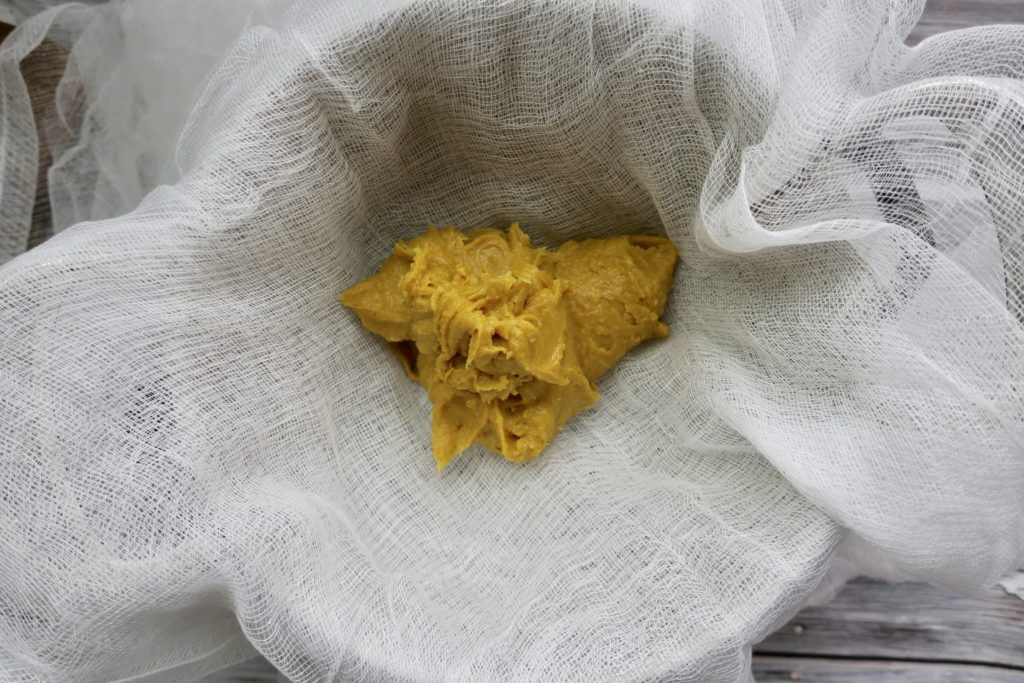
Just soak and strain the cashews, blend the ingredients, strain in a cheese cloth, let it chill in the fridge & roll shape it up.

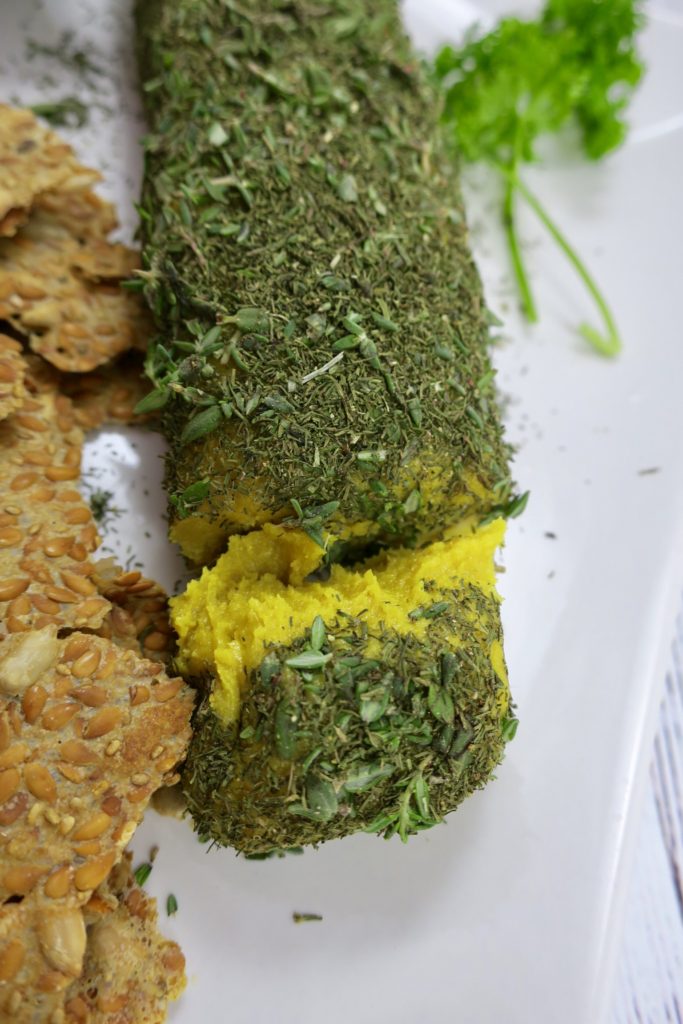
The turmeric in this mixture tricks you into believing you’re eating the orange cheddar you used to indulge in.

Get creative with the herbs that make the outer layer. What fresh herbs are hiding in that fridge of yours? Use them!


This is one of the many recipes up on Instagram for the 2nd #VancityVirtualPotluck organized by Piquant Marketing!

Check out my Instagram (@hookedonplants) to see the dishes before and after this yummy cheese (over 80 total)!

Benefits:

–Cashews are packed with minerals and antioxidants. Because of the magnesium and calcium, your nerves and bones will thank you. The copper in these babies will ward of colon cancer and help keep your hair vibrant!

–Turmeric is nature’s anti-inflammatory. All disease starts with inflammation within the body, so warding off inflammation is the key to longevity and health! Eating turmeric with a tiny bit of pepper makes curcumin (the active ingredient in turmeric) WAY more easily absorbable for your body,

–Nutritional yeast (NOOCH) is a vegan’s best friend when it comes to anything cheezy. Plus it’s packed with B12, all vegans and non-vegans need more of this! B12 is found in microbes in the soil (which is eaten by animals, then humans eat the animals), but the soil is becoming depleted of nutrients and vitamins, so the best way to ensure you’re receiving all the B12 you need is to eat fortified B12 foods (like some plant-based milks), eat nutritional yeast every day, or be safe and take a B12 supplement. But, ‘Nooch’ is the most delicious way to get your B12.

Vegan Turmeric Cheese Log

Serves: 6-8

Time: Actually ‘doing stuff’ time: 10 minutes. Soak and chill time: 7-24 hrs

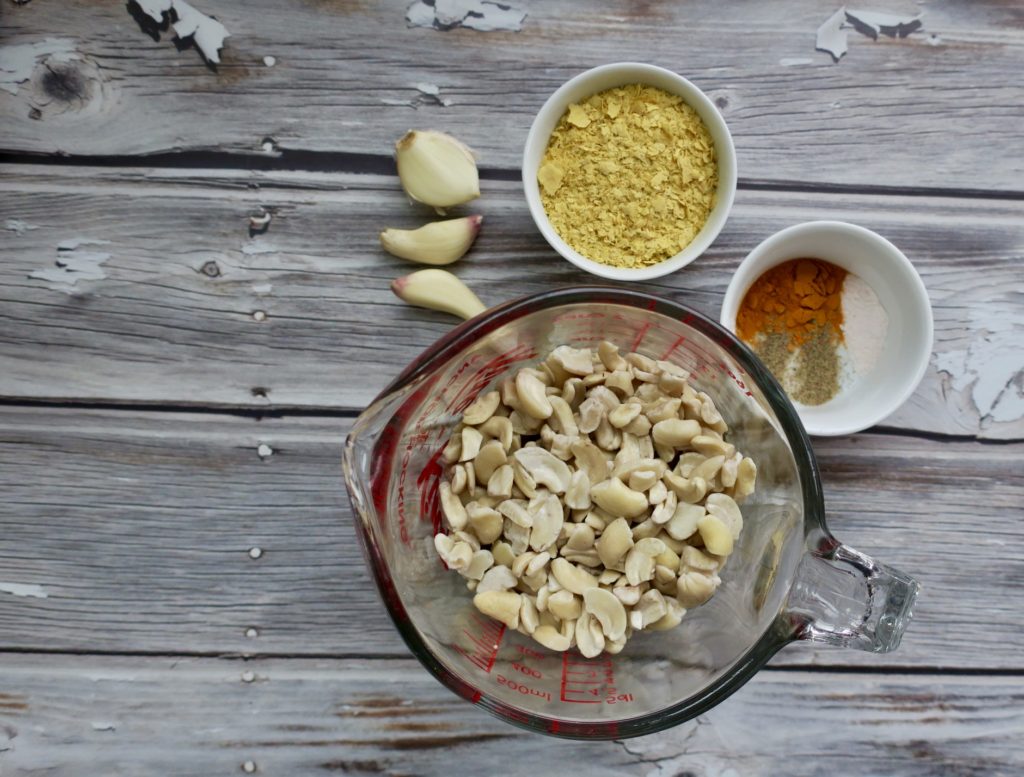
Ingredients:

Cheeze:

  • 1 cup raw cashews, soaked overnight, then strained and rinsed (OR if you’re in a hurry, pour boiling water over your raw cashews and let soak for 1.5 hours)
  • 1/4 cup nutritional yeast
  • 3 cloves garlic
  • 1/8 tsp salt
  • 1/8 tsp pepper
  • 1/2 tsp turmeric powder
  • zest of half lemon (zest before cutting and sweezing the lemon)
  • juice of 1 lemon

Outer herbs:

  • 2 tbsp fresh thyme, minced
  • 2 tbsp fresh chives, minced

Directions:

  1. Blend all ‘cheeze’ ingredients together until smooth and creamy in your food processor (scrape down sides)
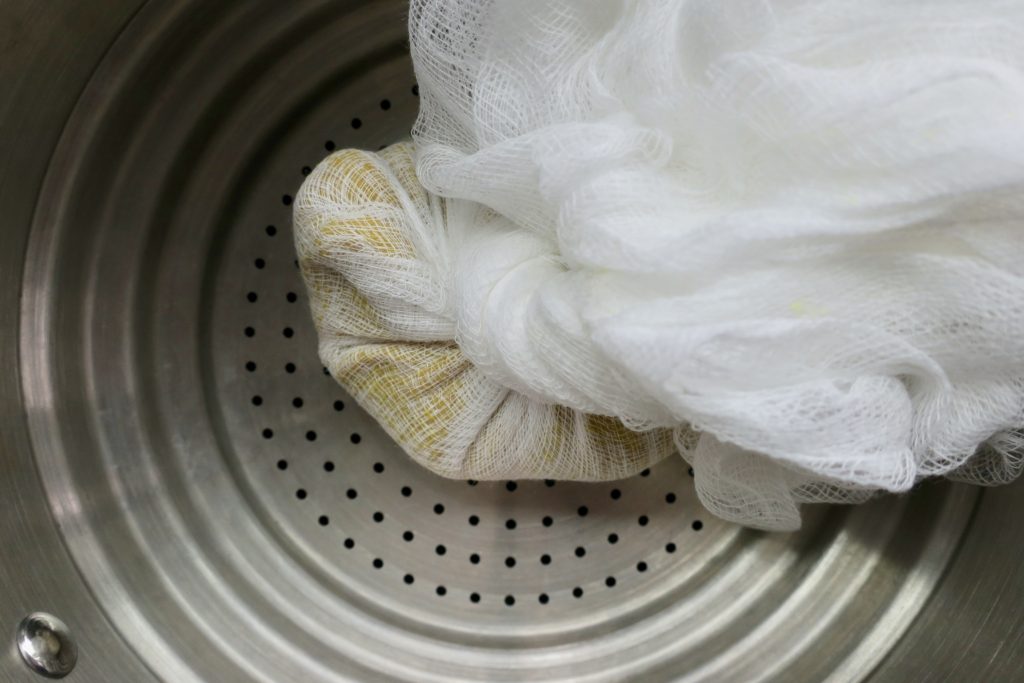
  2. Place mixture into two layers of cheesecloth or a nut milk bag and squeeze into desired shape (you can re-shape after too). Tighten by twisting the mesh cloth.
  3. Leave your ‘cheeze’ in the fridge over a colander (some liquid may drip out) for at least 6 hours (the longer the better!)
  4. Take it out of the cheese cloth and roll it into a log, then coat it with thyme and chives (a bit messy but helps the log keep it’s shape!)
  5. Serve with your favourite crackers, chips, or veggies! I’ve used my friend Eve’s Crackers here!

Filed Under: Appetizers, Dinner, Gluten Free, Lunch, Oil Free, Raw, Salt Free, Snacks, Spring, Summer, Uncategorized, Winter Tagged With: cashew cheese, cheese, cheeze, easy vegan cheese, nut cheese, turmeric cheese, vegan appetizer, vegan cheese, vegan cheeze log

  • « Go to Previous Page
  • Page 1
  • Interim pages omitted …
  • Page 10
  • Page 11
  • Page 12
  • Page 13
  • Page 14
  • Interim pages omitted …
  • Page 16
  • Go to Next Page »

Primary Sidebar

Search Recipes

WELCOME

welcome-julia-murray

Hi, I'm Julia! I like to simplify plant-based eating and make yummy recipes. I'm a Registered Holistic Nutritionist, certified plant-based chef, Olympian, and I make cereal (Jules Fuel). Enjoy! Read more

Instagram

hookedonplants

Olympian & RHN 🌱 Lighten Up with the Eat Plants & Dance Collective (coming soon) 🔗
@hookedonshuffling
🏠 Animal-Supporting Realtor
@living.in.whistler

Whistler, you’re about to get spoiled 😍 The Live Whistler, you’re about to get spoiled 😍

The Live Well Summit is going to be a juicy, dense, beautiful weekend, filled to the brim with an incredible lineup of teachers and workshops 🎉

I’m honoured to be part of it. I’ll be bringing a mood elevating lymph pump, and easy anti-inflammatory plant hacks through an Eat Plants & Dance workshop, so you can carry new habits with endless benefits into your next chapter.

3 days of inspiration coming at you.

Message the word ‘LIVE’ and I’ll send you a discount code for $25 off tickets. 
📣
Today is the last day before ticket prices go up.

Check out the line up!! 

@tedgrand, Modo Yoga co-founder, meditation
@itsmarkgroves, human connection
@sonnietrotter, climber, on courage
@blissology, yogi and surfer
@cristi_christensen, movement and music
@slavagoloubov, Movement Flow
@danieladibfitness, DibFit Cycle
@janetstoneyoga, 30 years of practice
@drgenieveburley, chiro and longevity
@empower_move_ment, acro and play
@kristincampbellyoga, crone wisdom
@marabranscombe, ritual and breath
@kiyokoverde, human design
@pl3yfitness, movement is medicine
@mckeonnicki, Wild Vedas
@practicewithlydia, yoga for real life
@drdivi, intuitive healing

Plus Dana Dixon, Joanna Berringer, Andrea Lee, Maeve Jones, Geoff Mackenzie, Christina Tottle, Kristi McMillan and Tara Findlay.

Created by the amazing & passionate Jenn Welsh @habrituals_official.

Come curious, leave inspired.

Let’s eat plants & dance 💃 

#whistlerlivewellsummit #whistler #livewell #plantbased #shuffledance
Replace those sugary bars with THESE. I’ve been ma Replace those sugary bars with THESE. I’ve been making bliss balls since wayyy before I chopped my hair off. 

Comment ‘SUBSTACK’ for the full recipe 🤤
But really, all mushrooms are magical. The benefit But really, all mushrooms are magical. The benefits are endless.

Read on to learn about the world’s first ever mushroom strip 🤯🙌

I’ve been a big fan of this company from the very beginning and even helped out during its startup. Functional mushrooms grown just down the road from me in beautiful Pemberton BC, created by a friend of mine.

I love everything Stay Wyld makes, but these pocket strips are the most convenient and fun way to take your mushrooms on the go.

Have you tried them yet?

So what’s actually in these sugar free pocket strips?

🧠 Energy LST Strip
Lion’s Mane, B12, L-Theanine, and green tea.

💪 Immunity LST Strip
2800mg of 7 functional mushrooms + vitamins, all in one little strip:
🍄 Lion’s Mane — brain power
🍄 Chaga — cellular defence (antioxidant powerhouse)
🍄 Cordyceps — energy & resilience & blood flow
🍄 Turkey Tail — gut + immunity
🍄 Maitake — metabolic support
🍄 Reishi — stress & immune balance
🍄 Shiitake — immune-active compounds
Can we all just give @erinireland a mega hands up Can we all just give @erinireland a mega hands up 🙌🙌in the comments for all she does for the animals, veganism, and our taste buds?! 

@pachavega  Danielle had one request before whipping back to Nicaragua: ‘I MUST have a @tolivefor.bakery cinnamon bun before I leave’ and it did not disappoint.

Thx @erinireland for holding one for us 🤤🤤🤤

Support vegan biz as much as you can - 💙💙💙

#veganfood #vegandessert #vegancafe #vegancinnamonbuns #veganyvr
Dinner tonight? Tofu Poke Bowl 🎉👌 🌱 🌱Base: Brown Dinner tonight? Tofu Poke Bowl 🎉👌 🌱

🌱Base: Brown Rice (added artichokes, butter beans, green peas, tamari or @bragg aminos at the end).

🌱 Tofu Poke: (firm, chopped) tossed in tamari, maple syrup, Dijon, smoked paprika. Then tossed again in corn starch. Baked for 20 mins at 400 flipped half way. 

🌱Salad: dressing is pickle juice, Dijon, nooch, a little maple syrup.

🌱Toppers: capers, nori sheets, sesame seeds, avo, sauerkraut, sprouts.

🌱 Sauce: butter beans, cannellini beans, miso paste, nooch, pickle juice. Blend!!

Save this one for your next lazy-but-feels-fancy dinner night 🙌

Pro tip: cook big batches so you have rice / dressings/sauces in the fridge for your next creative whip it together kinda night 👩‍🍳

Protein-packed, whole-food plant powaaa.
 
Follow for more :)
👟👟🌱🌱
#EatPlantsandDanceCollective #LightenUpMethod #bowls #tofurecipes #vegandinner
Cuteness for your feed! ~ Zak PS: have you tried Cuteness for your feed! ~ Zak

PS: have you tried @virchewdogs ?

Delivered to the door and great for our skin, energy, digestion and the environment 🎉🎉🎉🎉

Founded by Laura 😍

For the love of plant-powered pups 🐶

We are quite obsessed 🤩 ~ Zak & Tez (comment ‘VIRCHEW’ for deets on our fav food)
We’re still floating from the Plants. Dance. Love. We’re still floating from the Plants. Dance. Love. Retreat ✨ 
It was everything we dreamed it would be and then some.

We danced kitchen, in the sunshine and in the rain.
We ocean dipped.
We got playfully curious about ourselves.
We learned to trust our intuition.
We supported eachother.
We laughed.
We devoured insanely delicious whole plant foods.
We experienced breath work & a sound bath. 

👟🌱Everyone learned the foundations of plant-based eating and shuffle dancing, all in the name of reigniting their internal spark and bringing home simple ways to pump the lymphatic system and add more plants into their own day-to-day lives. 👟🌱

And the women!! 💗

…Thank you for sharing your stories, for allowing yourselves to be supported, for saying yes to you and your own joy. 

The energy we curated for the weekend truly allowed everyone to feel safe and be exactly who they are.

We’re already dreaming up the next one. 🌱

🙏Endless gratitude to the local businesses who filled our goodie bags with so much goodness:
@staywyldorganics functional mushrooms
@glowchocolates and glitter tattoos
@WildWomenFlourish Magazine
@vandalmerchshop shirts
@wearesevenclothing by @pachavega 

Special thanks to @be.love.be.free for the Intuition and Self Trust workshop and video documentation 🥰🎥

xo your hosts, 
Danielle @pachavega 
& Jules @hookedonplants @hookedonshuffling

Tag a friend you’d love to experience this with, (and where should we take it next?)👇

🌱Menu highlights:
Hand-rolled sushi we made together, build-your-own berry parfait bar, layered raw dessert creation, vibrant Buddha bowls, ceremonial cacao, and a plant-based sharing board to send us off.

✨Itinerary flow: 
Arrive + land. Cacao + opening circle. Shuffle workshops each day in the garden and beach. Culinary sessions in the kitchen together. Breathwork + sound healing. Human Design + self-love. Guided journaling + ocean dip. Integration + closing circle with cacao.

#plantbasedretreat #shuffledance #womensretreat #vancouverisland  eatplantsanddance
📍Qualicum Beach, BC
Part 2: Last month’s adventure with Mama Steph 🥰 D Part 2: Last month’s adventure with Mama Steph 🥰
Day 4-6 on the Cornwall England Hiking Trip with @veganadventureholidays 

Day 4 – Pendeen to Sennen Cove (9.5 mi / 15 km), Cape Cornwall + beach walk + vegan ice cream 

Day 5 – Sennen Cove to Porthcurno (6.5 mi / 10.5 km), Land’s End with epic winds
@landsend 

Day 6 – Porthcurno to Lamorna (5.4 mi / 8.7 km), Minack Theatre (best vegan carrot cake & a shuffle dance stage 😌@hookedonshuffling) 

Day 7 – Lamorna to Penzance (6.1 mi / 9.8 km), coffee stop in Mousehole (see a couple reels back for a spotlight on @orangemousehole vegan cafe 💯)

With local guide @exploreincornwall Steve explaining every nook, and piece of history & wildlife we saw. 

& yummy vegan dinners in St Ives every night. 

Shout out to @yvettespantry for the trail lunches and delish cinnamon bun for our last day… and @thebeaninnrestaurant veg St Ives restaurant for yummmmminess 2 nights & @orangemousehole for being fully vegan & delish!!!!

Check out Emma’s @veganadventureholidays hiking trips! Such a special experience ❤️🌎

#vegantravel #travellingvegan #cornwall
Swipe for menu and itinerary 🤩🤤 We cannot wait to Swipe for menu and itinerary 🤩🤤

We cannot wait to host 9 amazing women this weekend. 

Are you a last-minute girlie? 

We have ONE spot left. 

If you love learning about plant based cooking, connecting with women, and have been curious about learning, the foundational shuffle dance moves for lymphatic drainage, and pure joy… This is a total no-brainer (especially if you live on Vancouver Island)! 

Comment or message the word ‘RETREAT’
& we will answer any questions you may have! 

Just posed on substack all about it. 
Message the word ‘SUBSTACK’ to check it out. 

See you this weekend:)!

#retreat #shuffledance #shuffling #plantbasedretreat #eatplantsanddance
Join the Community

Categories

  • Appetizers (24)
  • Breakfast (39)
  • Brunch (9)
  • Dessert (66)
  • Dinner (79)
  • Drinks (7)
  • fall (4)
  • Gluten Free (95)
  • halloween (2)
  • Holidays (19)
  • Hooked On People Interviews (19)
  • Jules Fuel (5)
  • Lifestyle (22)
  • Lunch (79)
  • Oil Free (89)
  • One Pot (1)
  • Raw (45)
  • Ready under 30 (1)
  • Recipes (155)
  • Salt Free (41)
  • Sauces/Dressings (34)
  • Snacks (79)
  • Spring (41)
  • Summer (42)
  • Thanksgiving (11)
  • Travel (1)
  • Uncategorized (152)
  • Vegan Dogs (1)
  • Veganism (15)
  • Winter (29)

© 2016 Veritas Techsoft Pvt. Ltd

Check out Hooked on Plants Substack

Recipes, health hacks for a busy life, and interesting ways to lighten up. Plus a surprise gift.

SUBSCRIBE HERE